Disclosure: This post contains affiliate links and I will be compensated if you make a purchase after clicking through my links. Learn More
Got scratches on your porcelain sink? Don’t worry.
You can clean them easily. Porcelain sinks are popular for their durability and classic look. But over time, they can get scratched. These scratches can make your sink look old and dirty. Cleaning these scratches may seem challenging, but it’s actually quite simple with the right approach.
In this guide, we will show you how to restore your sink’s shine. From everyday items to special products, you’ll learn effective methods. Say goodbye to those annoying scratches and hello to a beautiful, spotless sink. Ready to get started? Let’s dive in.
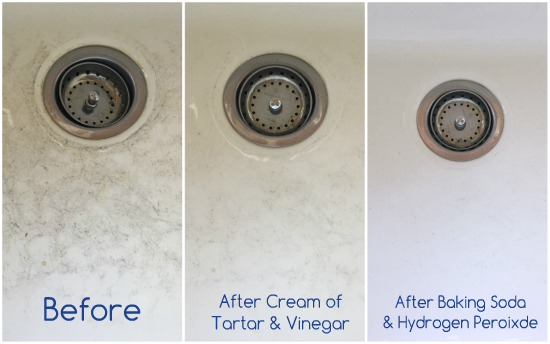
Credit: www.lemonslavenderandlaundry.com
Preparation
Cleaning porcelain sink scratches requires careful preparation to ensure a smooth and effective process. Proper preparation not only makes the task manageable but also maximizes your efforts in restoring the sink’s pristine look. Let’s dive into the essential steps you need to take before tackling those pesky scratches.
Gather Supplies
Before starting, make sure you have all the necessary supplies at hand. Having everything ready saves time and prevents frustration mid-task. You’ll need a non-abrasive cleaner, soft cloths, and a porcelain repair kit if scratches are deep. Consider adding some baking soda for a gentle scrub, and vinegar for its cleaning prowess.
Think about your previous experiences with cleaning projects. Did you ever find yourself running to the store mid-job? Avoid this by preparing well. Having the right tools ensures efficiency and effectiveness.
Clear The Sink
Ensure your sink is free from clutter. Remove any dishes, soap bottles, or decorations. A clear workspace helps you focus on the task at hand and prevents accidental damage to items. Reflect on how a clutter-free sink feels more inviting.
Ask yourself: How many times have you struggled with cleaning because of obstacles in your way? Clearing the sink makes the cleaning process straightforward. It’s like preparing a blank canvas for your cleaning masterpiece.
Preparation is key. You set yourself up for success by gathering supplies and clearing the sink. Ready for the next steps? Let’s tackle those scratches with confidence!
Initial Cleaning
Cleaning porcelain sink scratches starts with proper initial cleaning. This step is crucial as it prepares the surface for further treatment.
Begin by removing any dirt or grime. This ensures a clean base for addressing scratches. Follow these simple steps for effective initial cleaning.
Use Mild Cleaners
Choose a mild cleaner for your porcelain sink. Avoid harsh chemicals that can damage the surface. Baking soda or a gentle dish soap works well.
Apply the cleaner on a soft sponge. Gently scrub the sink in circular motions. Focus on areas with visible scratches.
Rinse Thoroughly
After scrubbing, rinse the sink thoroughly. Use warm water to remove all cleaner residue. Make sure every spot is rinsed.
Check for any remaining dirt. Repeat the process if needed. A clean sink is essential for fixing scratches properly.
Identify Scratches
Porcelain sink scratches can be identified by running your fingers over the surface. Lightly visible marks indicate scratches. Regular cleaning helps to maintain the sink’s shine and prevents further damage.
Identifying scratches on your porcelain sink is the crucial first step in restoring its original shine and smoothness. Before diving into the cleaning process, you need to know what you’re dealing with. This helps in selecting the right tools and techniques. A careful inspection can save you time and prevent further damage. Let’s take a closer look at how to identify those pesky scratches effectively.
Inspect Surface
Begin by thoroughly examining the surface of your sink. Use a bright flashlight to highlight any irregularities.
Run your fingers gently over the sink to feel for any rough patches or grooves. Sometimes, scratches are more easily felt than seen, especially if they’re shallow.
It’s important to remember that not all blemishes are scratches. Some may just be stubborn stains that need a different cleaning approach.
Mark Deep Scratches
Once you’ve identified scratches, mark the deeper ones with a small piece of masking tape. This will help you focus your cleaning efforts where they’re needed most.
Deep scratches might require more than just a basic cleaning. They often need special attention or products designed specifically for porcelain.
Think about how you felt the last time you saw a scratch on something you cherished. It can be frustrating, but marking them makes the task feel manageable.
How does your sink look now? Are you surprised by the number of scratches? This step may be eye-opening, but it’s the first step toward a pristine sink.
Remove Light Scratches
Porcelain sinks can get light scratches over time. Baking soda and water can help clean these marks. Gently rub the mixture on the scratches with a soft cloth. Rinse thoroughly for a shiny finish.
Porcelain sinks add a touch of elegance to any bathroom or kitchen, but they can be susceptible to scratches. Light scratches can diminish their beauty, but with the right techniques, you can make them look as good as new. Let’s dive into how you can effectively remove light scratches from your porcelain sink.
Baking Soda Paste
Start with a simple yet effective solution: a baking soda paste. Baking soda is a gentle abrasive that can help smooth out light scratches without damaging the sink.
To make the paste, mix a few tablespoons of baking soda with just enough water to create a thick consistency. You want it to be spreadable but not runny.
Apply the paste directly to the scratched area. Cover it generously, ensuring the entire scratch is hidden under the paste. Baking soda is readily available, making this a cost-effective solution for maintaining your sink.
Gentle Scrubbing
Once your baking soda paste is applied, it’s time for some gentle scrubbing. Use a soft cloth or a non-abrasive sponge to avoid further scratching the surface. You want to be firm yet gentle.
Rub the paste in circular motions over the scratch. This helps the baking soda work its magic by smoothing out the scratch and polishing the porcelain. Have you ever noticed how a gentle touch can sometimes be more effective than brute force?
After a few minutes of scrubbing, rinse the area thoroughly with warm water. Pat it dry with a clean towel to reveal a sink that looks remarkably fresh and smooth. Isn’t it satisfying to see the results of your efforts?
By using these simple yet effective techniques, you can keep your porcelain sink looking pristine. Have you tried any other methods that worked wonders? Share your experiences in the comments below!
Tackle Deep Scratches
Porcelain sinks are beautiful but prone to scratches. Deep scratches can be particularly tricky. They detract from the sink’s appearance. You need to handle them carefully. A systematic approach ensures long-lasting results. Addressing these scratches requires patience and the right tools.
Use A Porcelain Repair Kit
A porcelain repair kit is perfect for deep scratches. These kits contain essential materials. Most include fillers, sandpaper, and instructions. Choose a kit that matches your sink’s color. This ensures a seamless finish. Start by cleaning the scratched area. Remove all dirt and grime. This allows the filler to adhere properly.
Follow Instructions Carefully
Instructions in the kit are crucial. They guide you step-by-step. Read them thoroughly before starting. Apply the filler to the scratch. Use a spatula for even application. Allow the filler to dry completely. This usually takes several hours. Once dry, sand the area gently. Use the sandpaper provided in the kit. Sanding smooths the surface. Finish by polishing the area. This restores the sink’s shine.
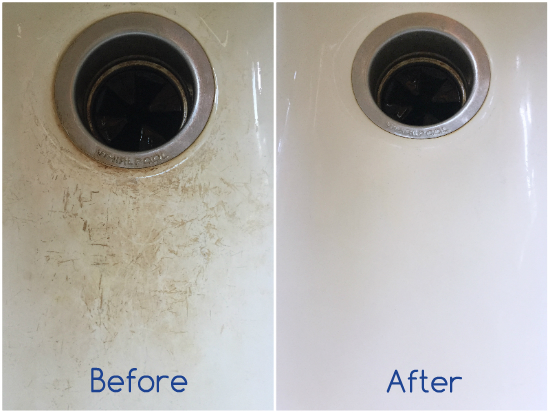
Credit: www.lemonslavenderandlaundry.com
Buff And Polish
Buff and polish your porcelain sink to erase scratches effectively. Use a gentle cleaner and soft cloth to restore its shine. Maintain your sink’s pristine look with regular care.
Your porcelain sink is a centerpiece in your kitchen or bathroom, but those pesky scratches can diminish its charm. Buffing and polishing are essential steps to restore your sink’s pristine appearance. Imagine the satisfaction of seeing your sink sparkle like new after a simple DIY session. Let’s dive into how you can achieve this flawless finish.
Apply Polishing Compound
To start, you’ll need a good quality polishing compound suitable for porcelain surfaces. You can find this at any home improvement store.
Begin by applying a small amount of the compound directly onto the scratched area.
Use your finger or a soft brush to spread it evenly across the surface. A little goes a long way, so don’t overdo it. Have you ever noticed how less is often more when it comes to cleaning products?
Buff With Soft Cloth
Once the compound is applied, it’s time to buff. Choose a soft, clean cloth—microfiber works wonders for this task.
Gently rub the cloth over the scratched area in circular motions. Think of it like giving your sink a gentle massage.
This helps to smooth out the surface and blends the compound seamlessly into the porcelain.
Have you tried using an old t-shirt for buffing? It often works just as well, proving that some household items can double as cleaning tools.
It’s fascinating how a bit of elbow grease can transform your sink. After buffing, you should notice a significant improvement in the appearance of the scratches.
Before you wrap up, give your sink a final rinse with warm water. This will remove any residue left by the compound.
Isn’t it amazing how a simple process can make a world of difference to your home aesthetics?
Prevent Future Scratches
Porcelain sinks require gentle care to avoid future scratches. Regular cleaning with mild soap and soft cloth helps maintain their shine. Avoid abrasive cleaners and scrubbing pads for a scratch-free surface.
Cleaning porcelain sinks and keeping them scratch-free is not just about fixing existing issues—it’s also about preventing future ones. The key lies in adopting simple habits that safeguard your sink’s surface. You’d be surprised how small changes can make a big difference in maintaining that pristine look. Let’s dive into some practical ways to prevent future scratches.
Use Protective Mats
Place a protective mat at the bottom of your sink. This is a small investment that can save you from the frustration of scratches. Mats act as a barrier between your sink and pots, pans, or any other heavy items.
They cushion impacts and prevent direct contact with the sink’s surface. Have you ever accidentally dropped a heavy skillet into your sink? The mat will absorb the shock, preserving the porcelain’s integrity.
Consider using silicone mats, which are durable and easy to clean. They’re designed to withstand heat and resist stains. You can even find stylish options that complement your kitchen decor.
Avoid Abrasive Cleaners
Choose your cleaning products wisely. Abrasive cleaners may promise a deep clean, but they can also be harsh on porcelain surfaces. Opt for non-abrasive alternatives that gently clean without scratching.
Use mild dish soap or specific cleaners designed for porcelain. These products are gentle yet effective, leaving your sink spotless without compromising its finish. Remember, the goal is to clean and protect, not to strip away the surface.
Consider this: every time you scrub with a harsh cleaner, you risk creating tiny scratches. Over time, these can accumulate, dulling the sink’s shine. Are those few minutes of aggressive scrubbing really worth it?
—
By adopting these habits, you can keep your porcelain sink looking beautiful and scratch-free. What other simple changes can you make to enhance your home’s functionality and appeal?
Regular Maintenance
Regular maintenance keeps your porcelain sink looking new and shiny. It also prevents scratches from becoming worse over time. Simple tasks can help maintain its beauty. Follow a few easy steps to ensure your sink stays pristine.
Weekly Cleaning Routine
Clean your porcelain sink every week. Use a soft sponge and mild dish soap. Avoid harsh chemicals that can damage the surface. Scrub gently to remove dirt and stains. Rinse thoroughly with warm water. Dry with a soft cloth to avoid water spots.
Periodic Inspections
Check your sink regularly for scratches or damage. Look closely at high-use areas. Small scratches can be buffed out with a non-abrasive cleaner. Addressing issues early prevents further damage. Keeping an eye on your sink ensures long-lasting beauty.
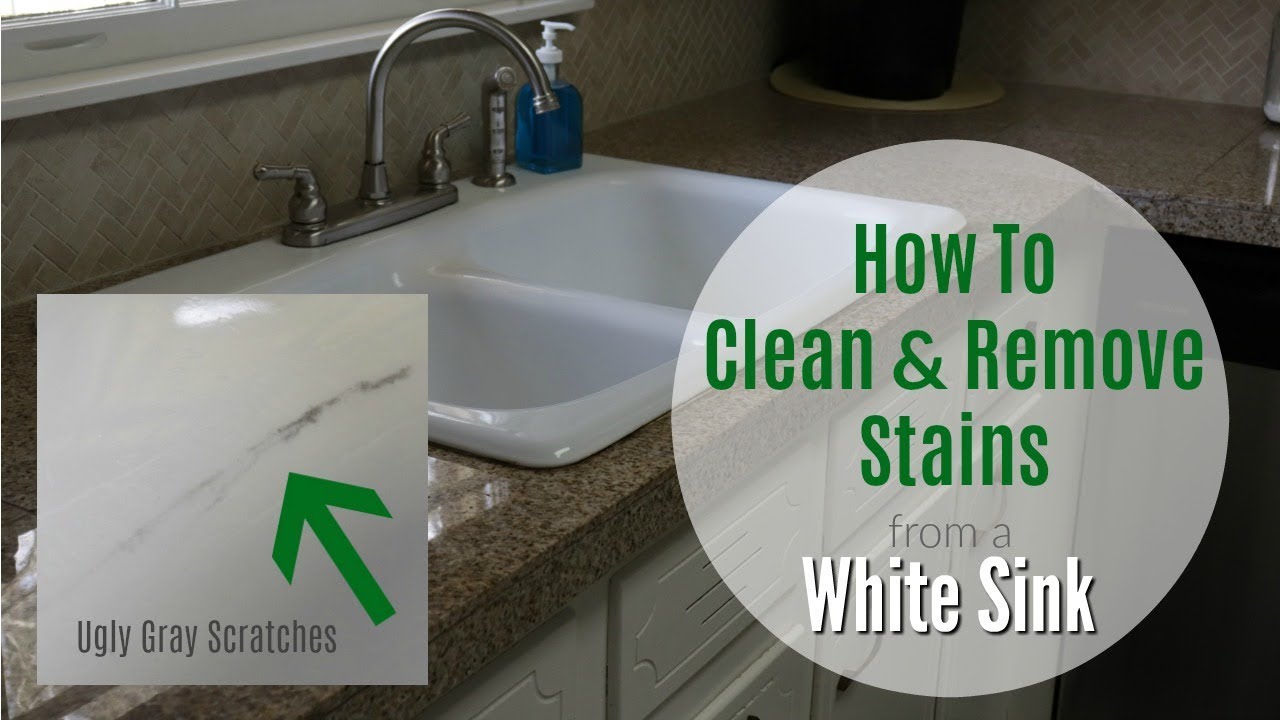
Credit: www.youtube.com
Frequently Asked Questions
How Do You Get Scratches Out Of A Porcelain Sink?
Use baking soda and water paste to scrub the scratches gently. Rinse thoroughly and dry with a soft cloth.
Will Magic Eraser Scratch Porcelain Sink?
Magic erasers can scratch a porcelain sink if used too aggressively. Gently test on a small area first. Use light pressure to prevent any damage. They effectively remove stains but can dull the finish over time if overused. Always follow the manufacturer’s instructions for best results.
How To Remove Fine Scratches From Porcelain?
Rub baking soda and water paste on scratches with a soft cloth. Rinse and dry thoroughly.
How Can I Make My Porcelain Sink Look New Again?
Clean with baking soda and vinegar to remove stains. Use a non-abrasive cleaner for daily maintenance. Polish with lemon oil for shine. Avoid harsh chemicals to protect the surface. Regular care keeps your porcelain sink looking new.
Final Words
Cleaning scratches from porcelain sinks is easier than it seems. With simple tools and techniques, your sink can look new. Regular maintenance helps prevent future scratches. Always use gentle materials to clean the surface. Avoid harsh chemicals which can damage the porcelain.
A soft cloth works best for daily cleaning. For deeper scratches, try baking soda paste. Rub gently in circular motions. This method is safe and effective. Patience and care ensure the best results. Protect your sink with a mat. This reduces the risk of scratches.
Keep your sink gleaming with these easy steps.

