Disclosure: This post contains affiliate links and I will be compensated if you make a purchase after clicking through my links. Learn More
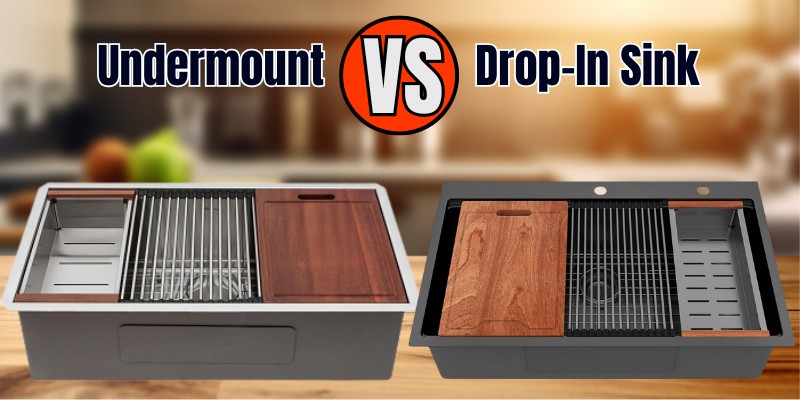
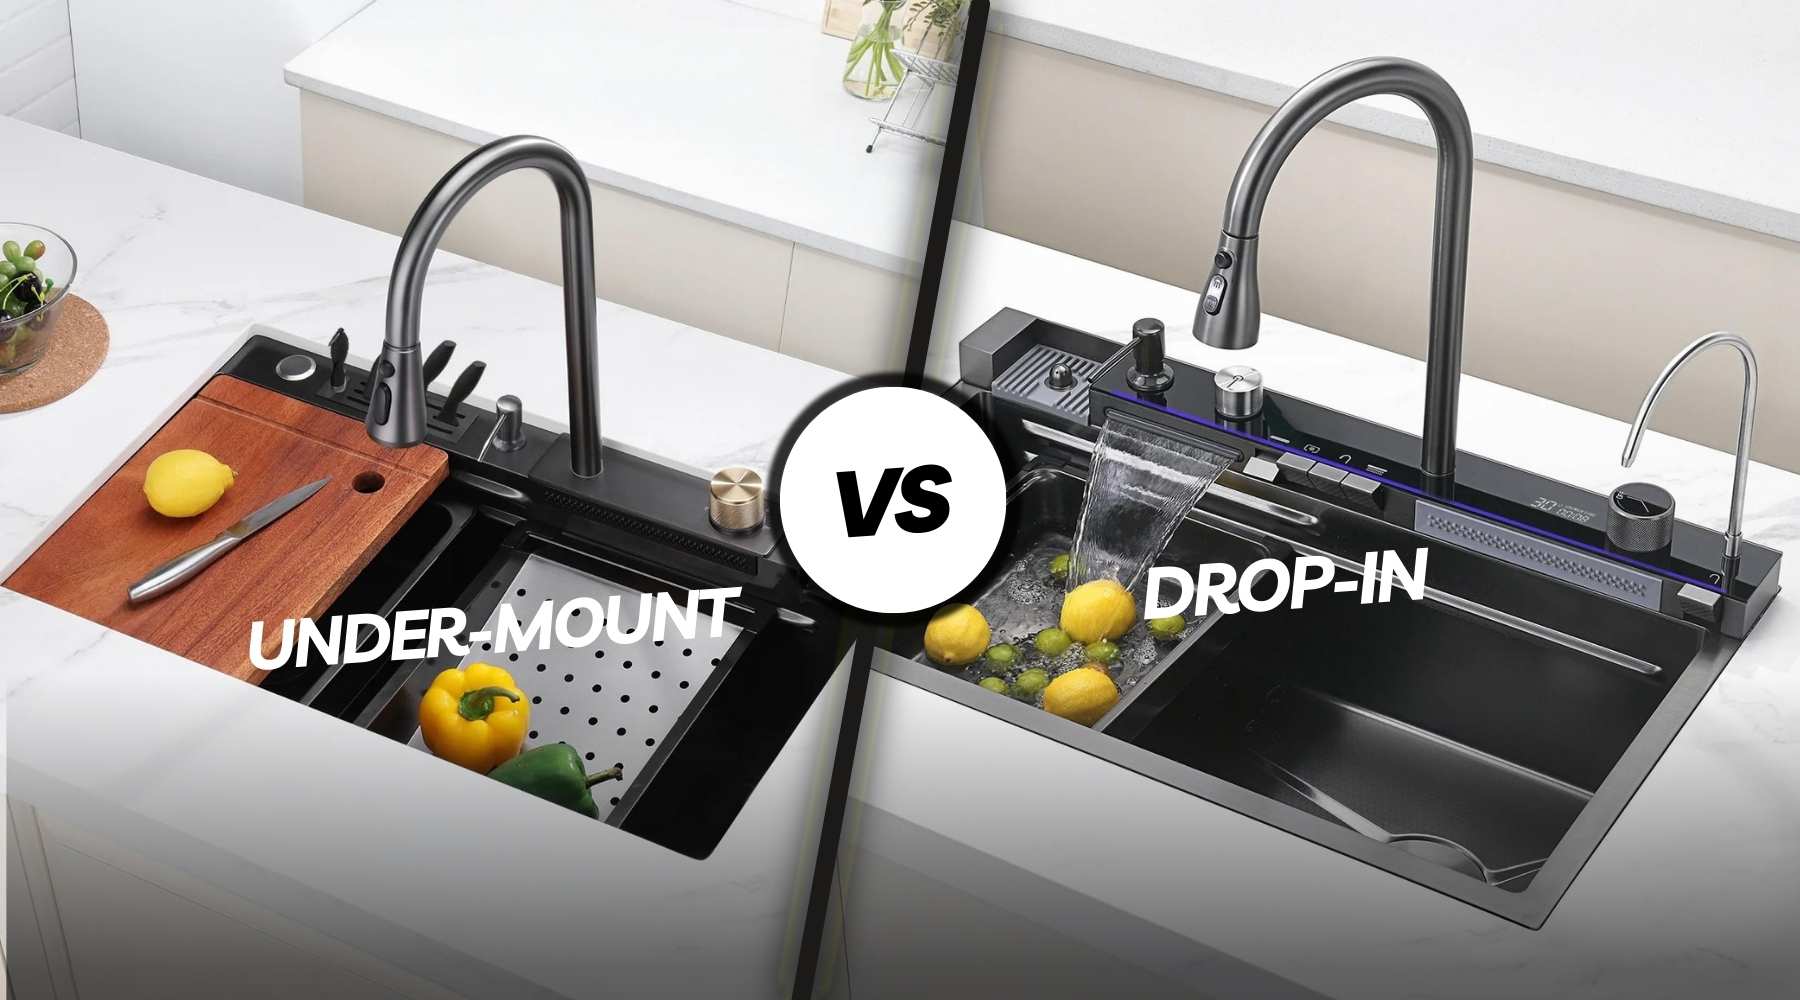
Choosing between an undermount and drop-in sink affects your kitchen’s appearance, cleaning routine, and renovation budget. Drop-in sinks (also called top-mount or self-rimming sinks) sit on top of your countertop with a visible rim, while undermount sinks attach underneath for a seamless look. Your countertop material often decides for you – laminate requires drop-in, while granite and quartz work best with undermount.
This guide covers costs, installation, materials, and maintenance to help you choose the right sink for your kitchen renovation.
Quick Comparison: Undermount vs Drop-In Sinks at a Glance
| Factor | Drop-In (Top-Mount) | Undermount |
|---|---|---|
| Installation Cost | $150-300 | $200-600 |
| Best For | Laminate counters, DIY projects, budget renovations | Granite/quartz counters, modern kitchens |
| Cleaning | Rim catches debris, requires extra wiping | Wipe debris directly into sink |
| Appearance | Visible rim, traditional look | Seamless, contemporary style |
| DIY Friendly | Yes | No, professional required |
| Works With | All countertop materials | Stone countertops only |
What is an Undermount Sink?
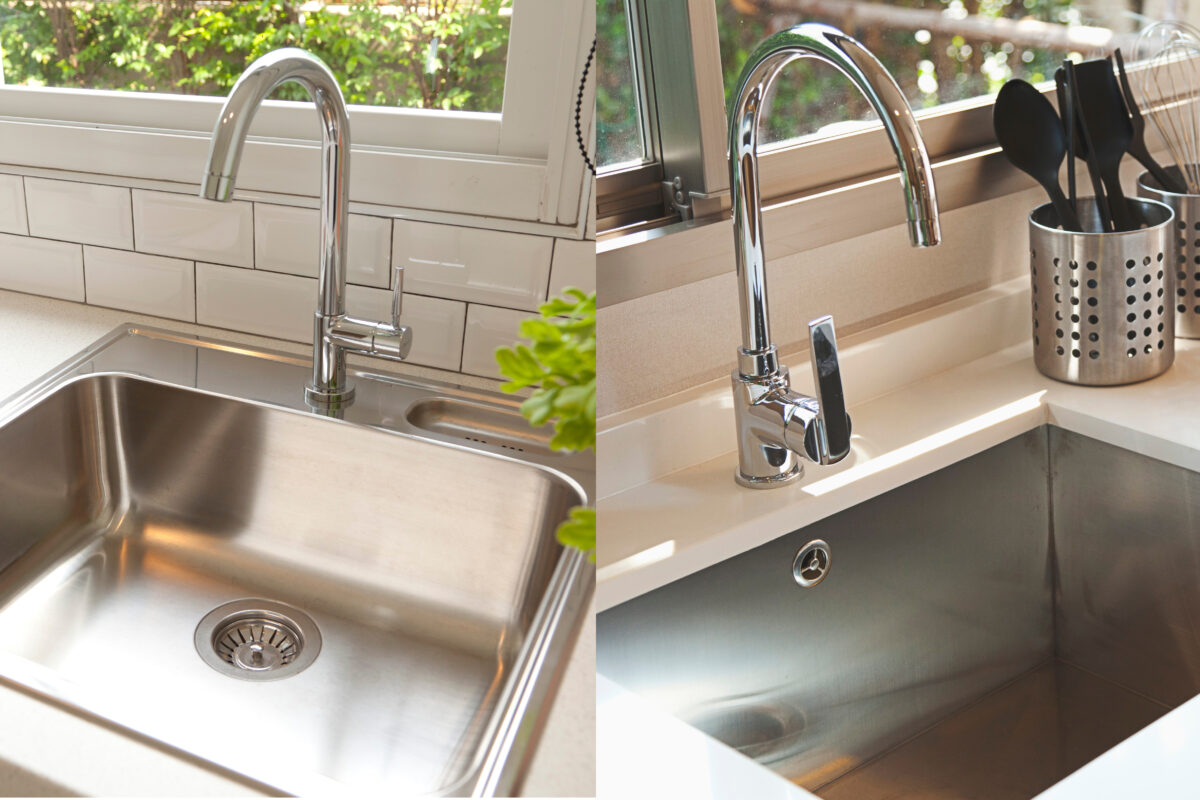
An undermount sink attaches to the bottom of your countertop instead of sitting on top. You see no rim or edge when you look at your counter. The countertop material extends right to the edge of the sink basin, creating a smooth transition.
Installing an undermount sink requires mounting it from below using specialized mounting brackets, clips, and strong epoxy adhesive. The sink hangs suspended under the countertop. This means your countertop material must be thick and strong enough to support the sink’s weight plus water and dishes.
The edge of the countertop cutout stays visible with an undermount sink. Fabricators polish and finish this edge so it looks clean and matches the rest of your counter. This installation style creates a clean, modern appearance that showcases premium countertop materials.
Undermount sinks only work with solid countertop materials like granite, quartz, marble, or solid surface. They cannot be installed with laminate countertops because laminate has a thin layer over particle board that cannot support the sink’s weight or be finished attractively at the edge.
Best For:
- Kitchens with granite or quartz countertops
- Homeowners prioritizing easy cleaning and modern aesthetics
- Long-term investments in forever homes
- High-end renovations focusing on resale value
Advantages of Undermount Sinks
Clean, Modern Look: Undermount sinks showcase your countertop material without interruption. The continuous surface looks more expensive and contemporary. If you invested in beautiful stone countertops, an undermount sink displays them properly. This aligns with current kitchen sink trends favoring seamless designs.
Easier Daily Cleaning: You wipe crumbs and spills directly into the sink basin. No rim catches debris or requires separate attention. This saves time during daily kitchen cleanup and keeps your counter looking cleaner with less effort. This makes undermount one of the easiest sinks to keep clean.
More Usable Counter Space: Without a rim taking up surface area, you gain about an inch of counter space around the sink perimeter. You can place items flush against the sink edge and use every bit of available workspace. This matters significantly in small kitchens.
Increases Home Value: Real estate agents report that buyers notice and appreciate undermount sinks. The modern appearance suggests a well-maintained, updated kitchen. Most new construction homes include undermount sinks as standard in granite and quartz countertops.
Less Surface Water Damage: Water sits on top of the counter with a drop-in sink, potentially seeping under the rim. With an undermount sink, water drips down into the basin. The seal sits below the counter surface where standing water cannot reach it as easily.
Better For Workstation Accessories: Modern workstation sinks with integrated cutting boards, colanders, and drying racks work better with undermount installations because accessories sit level with the counter surface.
Find Here: Best Undermount Kitchen Sinks
Disadvantages of Undermount Sinks
Higher Installation Costs: Professional installation of an undermount sink costs $200-600 depending on your sink size and countertop material. The installer must secure the sink from below using specific mounting systems (spring clips or screw clips), apply epoxy adhesive, wait for it to cure, and ensure proper support. This takes 2-4 hours compared to 30 minutes for a drop-in sink.
Requires Professional Installation: Most homeowners lack the tools and experience to install an undermount sink properly. You need specific adhesives (epoxy vs silicone vs construction adhesive), mounting systems, and techniques to ensure the sink stays attached. Poor installation leads to sink failure and potential countertop damage.
Limited Countertop Compatibility: Laminate countertops cannot support undermount sinks. The particle board substrate absorbs water and crumbles. The laminate edge looks unfinished when exposed. If you have laminate and want an undermount sink, you must replace your entire countertop first.
Risk of Seal Failure: Undermount sinks depend entirely on adhesive and mounting clips to stay attached. If the seal fails, the sink can separate from the countertop and leak water into the cabinet. Heavy use, heat, and moisture slowly degrade the bond over time. This represents the main undermount sink problem homeowners face.
Difficult and Expensive to Replace: Removing an undermount sink often damages the countertop edge. The adhesive bonds so strongly that chunks of granite or quartz can break away. You may need to hire a fabricator to repair and repolish the edge, adding $300-800 to your replacement costs.
Weight Restrictions Apply: Very heavy sinks made from thick cast iron or stone require extra support brackets and stronger adhesive. Some undermount installations cannot handle sinks over 50-60 pounds when full of water and dishes. You must verify weight capacity before purchasing.
Exposed Cutout Edge: The countertop edge around the sink stays visible. Fabricators must cut cleanly and polish this edge, which adds to the countertop installation cost. Any chips or damage to this edge show prominently and cannot be hidden.
More Complex Garbage Disposal Installation: Installing a garbage disposal on an undermount sink requires careful work to avoid disturbing the sink’s adhesive bond. You need proper support while mounting the disposal unit.
One customer insisted on installing an undermount sink in her laminate countertop. We explained it wouldn’t work, but she found someone willing to try. Within three months, the sink separated from the counter, and water damage ruined the cabinet below. She ended up replacing both the countertop and cabinet.
What is a Drop-In Sink?
A drop-in sink sits inside a hole cut in your countertop with its rim resting on top of the surface. These sinks are also called top-mount sinks, overmount sinks, or self-rimming sinks because the rim mounts over the countertop and supports the entire unit without additional hardware.
You’ll see the metal or porcelain edge all the way around the sink basin. The rim typically measures between half an inch to one inch wide. The sink flange (the flat rim portion) extends over the countertop cutout and creates a seal with caulk or silicone.
When you install a self-rimming sink, you place it into the cutout from above, and the rim catches on the countertop surface. Most drop-in sinks use spring clips or screw clips underneath to hold them tight against the counter, though the rim does most of the work supporting the weight.
You’ll find drop-in sinks in kitchens of all ages and price ranges. They work with laminate, tile, granite, quartz, wood, and any other countertop material. The installation process requires less precision because the rim covers any rough edges around the cutout.
Best For:
- Rental properties and quick flips
- Homeowners with laminate countertops
- DIY installers without professional experience
- Budget-conscious renovations under $1,000
Advantages of Drop-In Sinks
Lower Installation Cost: Drop-in sinks cost less to install because the process takes less time and requires fewer materials. You don’t need special epoxy adhesives, extra mounting hardware, or a polished countertop edge. Many homeowners install drop-in sinks themselves, saving $200-400 in labor costs. The self-rimming design makes the process straightforward.
Works With Any Countertop: Laminate countertops can only accept drop-in sinks. If you have laminate and want to upgrade your sink, drop-in remains your only option unless you replace the entire countertop. This flexibility makes drop-in sinks practical for budget renovations. The rim sits on any surface material without structural concerns.
Simple Replacement Process: Removing and replacing a drop-in sink takes about an hour. You cut the silicone caulk, remove the mounting clips, lift out the old sink, and drop in the new one. The rim hides any damage or discoloration around the old cutout, so you don’t need to repair the countertop. This makes retrofit installation simple.
Forgiving Installation: The sink flange covers about half an inch of countertop around the cutout. This means your hole doesn’t need perfectly smooth edges. Small chips or rough spots disappear under the rim. For DIY installers, this margin of error makes the job much more manageable.
Better Weight Support: The rim distributes the sink’s weight across the countertop surface. Heavy cast iron or fireclay sinks work well as drop-ins because the rim prevents the sink from pulling away from the counter. You don’t worry about adhesive failure or support brackets breaking under the weight.
Easier Garbage Disposal Installation: Mounting a garbage disposal to a drop-in sink is simpler because you have better access from below. The sink sits stable in its cutout during disposal installation, and you don’t risk disturbing the adhesive bond.
Disadvantages of Drop-In Sinks
Harder to Clean: The rim creates a ledge that catches food crumbs, water, and grime. You cannot wipe debris straight from the counter into the sink. Instead, you must clean around the rim, which takes extra time. Water pools against the rim edge, and you need to wipe it away to prevent mineral buildup.
Visible Seam Line: The rim creates a visual break in your countertop. If you have beautiful granite or quartz, the rim interrupts the stone pattern. Many people find this look less appealing than the seamless appearance of an undermount installation.
Moisture Problems: Water, grease, and food particles work their way under the rim over time. The caulk seal (not just silicone) around the rim can break down, allowing moisture to seep underneath. This creates mold and mildew that you cannot see or clean easily. You smell it before you see it.
Takes Up Counter Space: The rim adds an extra inch to your sink’s footprint. In a small kitchen, this reduces your usable counter space. The rim also makes it harder to place cutting boards or drying racks flush against the sink edge.
Requires Regular Maintenance: You should inspect and replace the caulk around a drop-in sink every 1-2 years. The seal degrades from heat, moisture, and cleaning products. Neglecting this maintenance leads to water damage in the cabinet below.
Less Contemporary Appearance: While not outdated, drop-in sinks look more traditional. Kitchen trends in 2025 favor the cleaner lines of undermount installations, particularly in mid to high-end homes.
We’ve replaced dozens of drop-in sinks where homeowners ignored the failing caulk seal. The water damage to the cabinet and countertop substrate often costs more to fix than the sink itself.
Understanding Sink Materials and Their Properties
The material you choose for your sink affects durability, appearance, maintenance needs, and cost. Each material has specific strengths that make it better for certain kitchens and cooking styles.
Stainless Steel Sinks
Stainless steel remains the most popular sink material in modern kitchens. These sinks resist stains, heat, and impacts well. They cost less than most other materials, with quality models ranging from $150-600.
Steel thickness is measured by gauge – lower numbers mean thicker metal. Look for 16 or 18-gauge steel for best durability and quieter operation with sound dampening pads on the underside. Thinner 20-22 gauge steel dents easier and makes more noise when water hits it. Major manufacturers like Kohler, Kraus, and Blanco offer stainless sinks in both drop-in and undermount configurations.
Read here: Best Gauge for a Stainless Steel Sink
Finishes range from brushed (hides scratches better) to polished (more reflective but shows water spots). Stainless steel sinks typically carry 10-year to lifetime limited warranties.
Ceramic and Porcelain Sinks
Ceramic sinks feature a smooth, glossy surface that looks classic and clean. The white finish brightens kitchens and hides water spots better than stainless steel. These sinks resist scratches and maintain their appearance for decades.
However, ceramic chips if you drop heavy pots, and repairs show visibly. The smooth surface cleans easily but stains from coffee, tea, and wine require prompt attention. Quality ceramic sinks from brands like Kohler and Elkay cost $300-800 depending on size and style. Expect 5-10 year warranties on ceramic sinks.
Enameled Cast Iron Sinks
Cast iron sinks coated with baked enamel combine old-fashioned durability with beautiful color options beyond basic white. The heavy weight (75-300 pounds) provides stability and reduces noise from running water and dishes better than any other material.
The enamel surface resists scratches and stains better than stainless steel. These sinks cost $400-1,200 and require professional installation due to their weight, particularly for undermount configurations. The enamel can chip from hard impacts, exposing the iron underneath which then rusts. Quality matters significantly – Kohler and Blanco cast iron sinks include lifetime warranties while budget options offer 5-10 years.
Granite Composite Sinks
Composite sinks blend crushed granite or quartz (80%) with resin binders (20%) to create extremely durable basins. These sinks resist heat up to 535°F, scratches, stains, and chips better than any other material. Brands like Blanco and Kraus lead this category.
They come in colors that match or complement granite and quartz countertops. The textured surface hides water spots and minor scratches. Composite sinks cost $250-900 and weigh less than cast iron while offering similar durability and sound dampening properties. They require minimal maintenance and last decades without showing wear. Most include lifetime warranties. Basin capacity typically ranges from 18-22 gallons for standard sizes.
Single Bowl vs Double Bowl Configuration
Sink bowl configuration affects how you use your kitchen workspace and the total basin capacity available. The choice between single and double bowls depends on your cooking habits, family size, and kitchen layout.
Single Bowl Sinks
A single bowl sink provides one large basin without dividers. This configuration offers maximum flexibility for washing large pots, baking sheets, and roasting pans. You can soak multiple dishes at once without working around a center divider.
Single bowl sinks work well in smaller kitchens where counter space is limited. The undivided basin makes the sink feel more spacious. You can install a dish rack or cutting board across the top of the sink to create temporary workspace. Modern workstation sinks include built-in accessories like cutting boards, colanders, and drying racks that fit perfectly into single bowl configurations.
The main drawback is that you cannot separate tasks. You cannot wash dishes in one side while defrosting meat in the other. If you fill the sink with dirty dishes, you have nowhere else to work until you empty it.
Most single bowl sinks measure 30-33 inches wide and 9-10 inches deep. The extra depth accommodates tall stock pots better than divided sinks. Basin capacity ranges from 20-25 gallons.
Best For:
- Small kitchens needing to maximize basin size
- Home cooks who regularly use large cookware
- Single-person or two-person households
- Minimalist kitchen designs
Double Bowl Sinks
Double bowl sinks feature two basins separated by a divider. This allows you to perform different tasks simultaneously. You can wash vegetables in one side while dirty dishes soak in the other. You can thaw meat in one basin while using the other for cleanup.
The most common configuration is 60/40, where one bowl is larger than the other. The larger bowl handles most washing tasks while the smaller bowl works for food prep or drying dishes. Equal-size 50/50 bowls provide balanced workspace but neither side fits large items well. Combined basin capacity typically ranges from 18-22 gallons.
Double bowl sinks require more counter space, typically 33-36 inches wide. The divider reduces the usable sink depth in each basin to 7-8 inches in many models. This makes washing large pots awkward.
Families with multiple cooks working in the kitchen simultaneously benefit most from double bowl sinks. The divided workspace prevents conflicts and improves efficiency during meal preparation.
Best For:
- Busy families with 3+ members
- Kitchens with multiple cooks
- Those who hand-wash dishes regularly
- People who need separate prep and cleanup zones
Cost Comparison: Undermount VS Drop-In Sinks
Undermount Sink Total Costs
Undermount sinks cost slightly more than drop-in equivalents. A stainless steel undermount sink costs $150-400. Quality 18-gauge models from Blanco or Kraus run $250-450. Composite and cast iron undermount sinks run $300-700. Premium materials cost $600-1,200 or more.
Professional installation costs $200-600 depending on sink size, weight, and countertop material. The installer needs:
- Epoxy adhesive ($20-40)
- Mounting brackets – spring clips or screw clips ($30-60)
- Support rods for heavy sinks ($40-80)
- 2-4 hours of labor at $50-150 per hour
Some jobs require two installers for heavy sinks, doubling labor costs.
Additional costs include:
- Countertop edge polishing if not included ($100-200)
- Reinforcement for heavy cast iron sinks ($75-150)
- New drain assembly ($20-50)
Total project cost for an undermount sink ranges from $350-1,800, with typical installations costing $500-900. This represents roughly double the cost of a drop-in sink installation.
Drop-In Sink Total Costs
The sink itself costs $100-600 depending on material and size. Stainless steel drop-in sinks from brands like Elkay and Moen start around $100-200 for basic 20-gauge models. Quality 18-gauge options from Kraus or Kohler run $200-350. Cast iron and composite drop-in sinks run $250-500. High-end copper or fireclay drop-in sinks can exceed $800.
Installation costs $0-200 if you do it yourself. You need silicone caulk ($8), a caulk gun ($5), and basic tools you probably own. Professional installation costs $150-300 including labor and materials. The job takes 30-60 minutes.
Additional costs include:
- Pre-drilled faucet holes if not included ($50-100)
- New drain assembly ($20-50)
- Sound deadening pads for stainless steel ($15-30)
Total project cost for a drop-in sink ranges from $100-900, with most installations falling in the $200-500 range. This makes drop-in sinks the budget-friendly choice for kitchen updates.
Long-Term Cost Considerations
Undermount sinks rarely need maintenance if installed correctly with proper adhesive and mounting systems. However, if the seal fails and causes water damage, repairs can cost $500-2,000 for cabinet and countertop fixes. Replacement costs more due to potential countertop damage.
Drop-in sinks require caulk replacement every 1-2 years at $50-100 if you hire someone or $10 for DIY silicone. Over 10 years, maintenance costs add $100-1,000 depending on whether you do it yourself.
For resale value, undermount sinks add more appeal to potential buyers. Real estate professionals estimate that modern kitchens with undermount sinks in stone countertops can increase home value by $2,000-5,000 compared to dated drop-in installations.
Warranties vary by brand and material:
- Budget brands: 5-10 year limited warranties
- Kohler: Lifetime limited warranty on most sinks
- Kraus: Lifetime limited warranty
- Blanco: Lifetime warranty on stainless, granite composite
- Elkay: Lifetime limited warranty
Installation Process Undermount Sink VS Drop-In Sink
Installing an Undermount Sink
Professional installation starts with cutting the countertop opening to exact specifications. The cut must be clean and smooth because the edge will be visible. Fabricators polish and finish this edge during countertop installation.
The installer applies epoxy adhesive (not silicone – epoxy bonds stronger to stone) to the rim of the sink where it contacts the countertop underside. They press the sink up against the counter and install mounting brackets and clips (typically screw clips for undermount) to hold it in position. The sink must be level and positioned correctly because you cannot adjust it after the adhesive sets.
Some installations use support rods or a mounting frame attached to the cabinet or wall. Heavy sinks (cast iron over 60 pounds) always need this extra support. The adhesive alone cannot hold the sink’s weight indefinitely, especially when full of water and dishes. NSF certification standards recommend additional support for sinks exceeding basin capacity of 20 gallons.
The epoxy adhesive requires 24-48 hours to cure completely. During this time, nothing can disturb the sink. After curing, the installer connects the drain assembly and seals the joint between sink and countertop with silicone.
Total installation time runs 2-4 hours, and the process requires experience and specialized tools. Most homeowners should not attempt undermount sink installation themselves. One mistake can damage an expensive countertop.
Professional Requirements:
- Experience with granite/quartz edge work
- Stone-specific epoxy adhesive systems
- Undermount mounting brackets rated for sink weight
- Support rod installation for heavy sinks
- Knowledge of proper curing times
Installing a Drop-In Sink
The process starts with measuring and cutting the countertop opening according to the sink manufacturer’s template. The hole should be slightly smaller than the sink flange so the rim has surface area to rest on. Standard countertop overhang should be at least 1 inch from cabinet face.
You apply a bead of silicone caulk (not just generic caulk – use kitchen and bath grade) around the underside of the sink rim. Then you lower the sink into the cutout from above. The sink sits on the counter supported by its rim. You press down to create a good seal.
From underneath, you attach mounting clips (spring clips or screw clips) to the sink and tighten them against the countertop. These clips prevent the sink from lifting but don’t bear the weight. You wipe away excess silicone that squeezed out from under the rim.
After connecting the drain assembly and faucet holes, you wait 24 hours for the caulk to cure before using the sink. The entire installation takes 30-90 minutes for someone with basic DIY skills.
Most homeowners successfully install drop-in sinks themselves following local plumbing code requirements. The process involves minimal risk because mistakes don’t usually damage the countertop permanently. If something goes wrong, you lift out the sink and try again.
Tools Needed:
- Adjustable wrench for drain assembly
- Jigsaw for countertop cutting
- Drill with hole saw for faucet holes
- Screwdriver for mounting clips
- Caulk gun
Faucet and Drain Considerations
Faucet Hole Configurations
Undermount sinks never have faucet holes because they install below the counter. All faucet holes must be drilled in the countertop itself, which countertop fabricators do during installation. This gives you more flexibility for faucet placement.
On the other hand, Drop-in sinks typically come with pre-drilled faucet holes. Standard configurations include:
- Single hole (4 inches) for modern one-handle faucets
- Three holes (8 inches on center) for traditional two-handle faucets with separate sprayer
- Four holes for bridge faucets or faucets with soap dispensers
If your sink doesn’t have holes, you can drill them yourself (stainless steel) or have it done professionally (cast iron, composite). Pre-drilled holes cost $50-100 more than sinks without holes.
You can also choose wall-mount faucets with either sink type, which eliminates the need for deck holes entirely. This creates an even cleaner look but requires plumbing inside the wall.
Drain Assembly Differences
Both sink types use similar drain assemblies, but installation differs slightly:
Undermount sinks: Installing the drain requires working around the mounting hardware and adhesive. You must complete drain installation carefully to avoid disturbing the sink’s bond to the countertop. Professional installation ensures proper drain assembly without compromising the sink mounting.
Drop-in sinks: The drain basket sits in the sink bottom and tightens from underneath. You have easy access during installation because the sink sits stable in its cutout.
Both configurations work with garbage disposals, though mounting the disposal to an undermount sink requires extra care not to stress the adhesive bond.
Countertop Material Compatibility Guide
Laminate Countertops
Laminate countertops only work with drop-in sinks. The particle board substrate cannot support an undermount sink’s weight. Water exposure destroys particle board quickly. The exposed edge of laminate looks unfinished and ugly at the cutout.
The self-rimming design of drop-in sinks covers the laminate edge completely, making it the perfect match. If you have laminate countertops and want the undermount look, you need to replace your countertops with granite, quartz, or solid surface material. No workaround exists.
Best sink choice: Drop-in (only option)
Granite Countertops
Granite works beautifully with both sink types. The stone’s strength and 3 cm (1.25 inch) thickness support undermount sinks perfectly. Most granite installations use undermount sinks to showcase the stone’s natural beauty and veining patterns.
You can install a drop-in sink in granite, but you hide some of the stone under the rim. People usually choose drop-in sinks in granite only when replacing an existing drop-in to avoid modifying the countertop or in retrofit installations.
The fabricator polishes the sink cutout edge to match the countertop finish. This polished edge looks professional and highlights the granite’s natural beauty. Proper countertop overhang (minimum 1 inch) ensures adequate support.
Best sink choice: Undermount (showcases stone) Alternative: Drop-in works fine
Quartz Countertops
Quartz countertops function identically to granite for sink installation. The engineered stone supports undermount sinks well with its consistent 3 cm thickness. Most quartz installations include undermount sinks because the seamless look fits the modern aesthetic quartz buyers want.
Quartz offers more uniform appearance than granite, and the polished edge around an undermount sink looks clean and professional. The non-porous surface resists staining better than granite at the exposed edge.
Best sink choice: Undermount (modern look) Alternative: Drop-in works fine
Marble Countertops
Marble has the same structural properties as granite for sink installation at 3 cm thickness. Both drop-in and undermount sinks work well structurally. However, marble owners usually prefer undermount sinks to display the marble’s veining and beauty without interruption from a rim.
Marble requires more maintenance than granite or quartz. The exposed edge around an undermount sink needs regular sealing to prevent staining. The polished edge shows the marble beautifully but requires protection from acidic substances.
Best sink choice: Undermount (displays veining) Consideration: Requires edge sealing maintenance
Solid Surface Countertops
Solid surface materials like Corian work with both sink types. Manufacturers make solid surface sinks that can be integrated seamlessly with the countertop, creating an undermount appearance without any seam at all. This represents the most durable kitchen sink material combination.
For standard undermount sinks, solid surface provides adequate support with proper thickness (minimum 3/4 inch). The material bonds well with epoxy adhesives and accepts mounting hardware. Drop-in sinks also work perfectly in solid surface countertops.
Best sink choice: Integrated solid surface or undermount Alternative: Drop-in works well
Wood and Butcher Block Countertops
Wood countertops present challenges for both sink types due to moisture sensitivity. Drop-in sinks work better because the rim protects the wood edge from direct water exposure. You must seal the wood around the sink cutout carefully with marine-grade sealant.
Undermount sinks in wood countertops risk water damage at the exposed edge. The constant moisture exposure can cause wood to swell, warp, or rot. If you choose an undermount sink with wood countertops, apply marine-grade sealant and maintain it every 6 months.
Best sink choice: Drop-in (protects wood edge) Consideration: Regular sealing required for either type
Maintenance Requirements for Each Sink Type
Daily Cleaning for Undermount Sinks
Wipe your counter and push debris directly into the sink – this is why undermount ranks as the easiest sink to keep clean. The lack of a rim makes this process quick and simple. You spend less time cleaning around the sink area compared to a drop-in installation.
Check the seam where the sink meets the countertop occasionally. This seal should remain dry and clean. If you notice water pooling here, you may have a drainage issue or the counter isn’t level.
Clean the visible countertop edge around the sink opening. This edge shows fingerprints and water spots on polished granite or quartz. Keep it clean to maintain the seamless appearance.
Daily Cleaning for Drop-In Sinks
Wipe down the entire sink basin and rim after each use. Pay special attention to the area where the rim meets the countertop. Food particles and moisture collect here. Use a soft cloth or sponge to clean around the rim thoroughly.
Check for standing water against the rim seal. Wipe this away to prevent mineral deposits and mold growth. Hard water leaves white calcium buildup around the rim that becomes difficult to remove if left too long.
Clean the rim itself with appropriate cleaners for your sink material. Stainless steel needs different care than porcelain or composite materials. Avoid abrasive cleaners that can scratch the finish or damage the silicone seal.
Long-Term Maintenance for Undermount Sinks
Undermount sinks need less regular maintenance than drop-in sinks. The seal sits below the counter surface where it stays drier and lasts longer. Most properly installed undermount sinks with quality epoxy adhesive go years without requiring attention.
Check for any separation between the sink and countertop every 6 months. Look underneath with a flashlight. You should see no gaps where light comes through. Any separation means the seal is failing and needs professional repair.
Listen for creaking or popping sounds when you fill or empty the sink. These noises indicate the sink is moving slightly, which means the mounting system is weakening. Address this immediately before the sink falls.
If you notice water dripping inside the cabinet from around the sink edge, the seal has failed. Stop using the sink and call a professional. Continued use will cause extensive water damage to the cabinet and countertop substrate.
Very heavy sinks (cast iron, stone) may need support bracket inspection every few years. Check that brackets remain tight and show no signs of rust or damage.
Maintenance Schedule:
- As needed: Professional resealing if problems develop
- Monthly: Quick visual check of seal
- Every 6 months: Inspect underneath for separation
- Annually: Check support brackets on heavy sinks
Long-Term Maintenance for Drop-In Sinks
Inspect the silicone seal around the rim every 3-6 months. Look for cracks, gaps, or areas where the caulk has pulled away from the rim or countertop. Dark spots or discoloration indicate mold growth under the seal.
Remove and replace the silicone every 1-2 years. Cut away the old caulk with a utility knife, clean the surfaces with rubbing alcohol, and apply fresh silicone caulk (use kitchen and bath grade, not general purpose). This prevents water damage and keeps the sink sanitary.
Check the mounting clips underneath the sink annually. Tighten any loose spring clips or screw clips to prevent the sink from shifting. A sink that moves even slightly will break the caulk seal and leak.
If you smell mildew near your sink, water has gotten under the rim. You need to remove the sink, clean and dry everything, then reinstall it with fresh silicone. Ignoring this problem leads to serious cabinet and countertop damage.
Maintenance Schedule:
- Every 1-2 years: Replace silicone seal completely
- Daily: Wipe rim and check for standing water
- Monthly: Inspect seal condition
- Annually: Check and tighten mounting clips
Switching Between Sink Types
Can You Replace Drop-In with Undermount?
Yes, but it requires countertop modification and only works with stone countertops. The existing cutout for a drop-in sink is larger than needed for an undermount because the rim covered imperfections.
Converting requires:
- Evaluating if your countertop is thick enough (minimum 3 cm for stone)
- Measuring the existing cutout to see if it’s within range for your new sink
- Having a fabricator polish the exposed edge (this adds $150-300)
- Professional undermount installation ($300-500)
Total retrofit installation cost ranges from $450-800 beyond the sink price. This makes sense when you’re keeping existing granite or quartz counters but want the undermount aesthetic.
If your existing cutout is too large, you may need a bigger sink or the fabricator might be able to build up the edge, though this is expensive.
Can You Replace Undermount with Drop-In?
Yes, and this is actually easier than the reverse. The undermount cutout is smaller and already has a polished edge. A drop-in sink’s rim will cover this edge plus some additional countertop area.
You’ll need:
- A drop-in sink with dimensions that cover your existing cutout completely
- Removal of old undermount mounting hardware
- Standard drop-in installation process
This conversion costs only $150-300 for professional installation, or you can DIY it. People choose this when an undermount seal fails and they want to avoid the cost of professional undermount reinstallation.
The downside is you’ll see the rim on your beautiful stone countertop, which negates the original reason you chose undermount. However, this conversion makes practical sense for rental properties or when selling quickly without investing in expensive repairs.
Making the Right Choice for Your Kitchen
Choose a Drop-In Sink When
You have laminate countertops and don’t plan to replace them soon. Drop-in sinks are your only option with laminate, and they work perfectly well in this application.
Your renovation budget is tight. Saving $200-400 on installation matters, and you can install the sink yourself. Drop-in sinks deliver good performance at a lower cost.
You like doing home improvement projects yourself. Installing a drop-in sink makes a satisfying weekend project that most homeowners can complete successfully with basic tools.
You plan to sell your home within a few years or it’s a rental property. Drop-in sinks cost less to install and replace, making them practical for temporary situations or investment properties.
You have an older home with existing drop-in sinks and want to replace just the sink without modifying countertops. Keeping the same installation style saves money and hassle during retrofit installation.
You need a sink installed quickly. Drop-in installation takes less than a day including curing time for the silicone.
You prefer easier access for garbage disposal installation and future plumbing repairs.
Choose an Undermount Sink When
You have granite, quartz, or marble countertops. These materials support undermount installation well, and the seamless look shows off your investment in quality countertops.
You prioritize easy cleaning and maintenance. The time you save wiping down your counters adds up over years of daily use. Undermount is the easiest sink to keep clean.
You want a modern, updated kitchen appearance aligned with 2025 kitchen sink trends. Undermount sinks look more current and appeal to contemporary design preferences.
You plan to stay in your home long-term. The higher upfront cost pays off through years of better functionality and appearance.
You care about resale value. Buyers notice and appreciate undermount sinks in updated kitchens with stone countertops. This represents one of the best investments for increasing home value.
You’re doing a complete kitchen renovation with new countertops. Adding an undermount sink costs less when the fabricator installs it with new countertops rather than retrofitting later.
You want a quiet kitchen sink with minimal noise. Undermount installation combined with sound deadening pads creates the quietest operation, especially important for busy families.
Best Sink for Small Kitchens
Small kitchens benefit most from undermount sinks because:
- Every inch of counter space counts – no rim taking up workspace
- Single bowl undermount configuration maximizes usable basin size
- Seamless appearance makes the space feel larger visually
However, if you have laminate counters in a small kitchen, a compact drop-in sink works fine. Choose the smallest rim width available to maximize counter space.
Best Sink for Busy Families
Busy families with heavy kitchen use should consider:
- Undermount granite composite sink: Most durable material, scratch resistant, quiet operation, easy cleaning
- Double bowl configuration: Separate zones for multiple tasks
- 18-gauge stainless steel minimum: Resists dents from dropped pots
- Sound dampening: Critical for reducing noise in active households
The easiest sink to keep clean (undermount) matters more when you’re wiping counters multiple times daily.
Quiet Kitchen Sink Options
For the quietest kitchen sink:
- Composite material (quietest overall)
- Cast iron (heavy weight absorbs sound)
- 16-gauge stainless steel with sound deadening pads
- Undermount installation (water hits basin from shorter distance)
Avoid thin 20-22 gauge stainless steel drop-in sinks, which amplify water noise significantly.
Most Scratch Resistant Kitchen Sink
Granite composite sinks from brands like Blanco and Kraus resist scratches better than any other material. The textured surface hides minor scratches that would show on stainless steel or porcelain. These sinks maintain their appearance for decades without showing wear.
For stainless steel, choose brushed finishes over polished – scratches blend into the grain pattern and become nearly invisible.
Common Problems and Solutions
Undermount Sink Problems
Sink Separating from Counter: You see a gap between the sink and countertop, or water drips into the cabinet. Stop using the sink immediately. The epoxy adhesive has failed and the sink needs professional remounting before it falls completely.
Dripping Sound in Cabinet: Water drips from the sink edge into the cabinet even though you don’t see leaks above. The seal has developed a small crack. This requires professional repair to remove the old adhesive, clean surfaces, and apply new epoxy properly.
Visible Damage to Countertop Edge: Chips or cracks in the polished edge around the sink usually result from impact damage. A stone repair professional can fill and polish small damage ($150-300). Large chips may require replacing the countertop section ($500-1,500).
Creaking Noises: The sink makes sounds when filling or draining. The mounting system is loosening and the sink moves slightly. Professional inspection and repair prevents complete failure. This typically requires removing and reinstalling the sink with new adhesive and mounting hardware.
White Residue on Seal: Mineral deposits from hard water build up where sink meets countertop. Clean with vinegar solution and soft cloth. This is cosmetic only unless accompanied by moisture or movement.
Drop-In Sink Problems
Mold Under the Rim: Black spots or musty smell near the sink means water has gotten under the rim seal. Remove the sink completely, clean all surfaces with bleach solution, let everything dry thoroughly for 24 hours, then reinstall with fresh kitchen-grade silicone caulk.
Loose Sink Movement: If the sink shifts when you press on it, the mounting clips have loosened. Tighten all spring clips or screw clips from underneath. If clips are damaged or stripped, replace them ($5-15 per clip) before the movement breaks the caulk seal.
Rust Stains Around Rim: Water sitting against the rim causes rust on steel sinks or stains on porcelain. Dry the area after each use. Apply car wax to steel rims to repel water and prevent rust formation.
Caulk Discoloration: Yellow or brown silicone looks dirty even if the sink is clean. Remove the old caulk completely with a utility knife, clean with rubbing alcohol, and apply fresh white or clear silicone. Use kitchen and bath caulk that resists mold and mildew.
Rim Lifting at Corners: Corners lift first when clips loosen or silicone fails. This creates gaps where water enters. Re-tighten clips and add fresh silicone immediately. Waiting causes cabinet damage.
When to Call a Professional
Knowing when to hire a professional saves you from costly mistakes and potential injuries. Here are specific warning signs and situations requiring expert help:
Immediate Professional Help Required
For Drop-In Sinks:
- Persistent mildew smell despite cleaning (indicates hidden water damage)
- Visible water damage or soft spots in cabinet below sink
- Sink dropping or sagging despite tightening clips
- Large cracks in sink basin (requires replacement)
- Multiple failed attempts to stop rim leakage
For Undermount Sinks:
- Any visible gap between sink and countertop
- Creaking, popping, or grinding sounds from sink
- Water dripping inside cabinet from sink area
- Visible sink movement when pressed
- Countertop edge damage or cracks near sink
How to Measure for Sink Replacement
Accurate measurements ensure your new sink fits properly without requiring countertop modifications. Follow this measurement guide for both sink types.
Measuring Existing Cutout
Step 1 – Measure Cutout Opening: Measure the opening in your countertop from inside edge to inside edge. Take measurements at the widest points:
- Front to back depth
- Left to right width
- Measure both directions twice to confirm
Step 2 – Measure Countertop Depth: Measure from the front edge of your counter to the backsplash. This tells you the maximum sink depth that will fit. Standard countertops measure 24-25 inches deep.
Step 3 – Measure Cabinet Width: Open the cabinet and measure the interior width. Your sink cannot exceed this measurement. Standard base cabinets range from 30-36 inches wide.
Step 4 – Check Sink Basin Depth: Measure from the top of your current sink rim down to the bottom of the basin. Standard sink depths range from 7-10 inches. Deeper basins require more clearance below for plumbing.
Step 5 – Measure Faucet Hole Spacing: If keeping your existing faucet, measure the distance between faucet holes (typically 4 or 8 inches on center). Count the total number of holes including sprayer and soap dispenser.
Choosing the Right Size Sink
For Undermount Replacement: Your new sink’s outer dimensions should match or be slightly smaller than the existing cutout. Some adjustment room exists, but going larger requires cutting and polishing more countertop edge.
For Drop-In Replacement: Your new sink’s rim must be at least 0.5 inches larger than the existing cutout in all directions. A cutout measuring 22 x 33 inches requires a sink with minimum rim dimensions of 23 x 34 inches.
Standard Sink Sizes:
- Small (15-24 inches): Bar sinks, prep sinks
- Medium (25-30 inches): Compact kitchens, single bowl
- Large (31-36 inches): Standard kitchens, double bowl
- Extra Large (37+ inches): Luxury kitchens, farmhouse styles
Minimum Cabinet Requirements:
- 30-inch sink needs 33-inch cabinet minimum
- 33-inch sink needs 36-inch cabinet minimum
- 36-inch sink needs 39-inch cabinet minimum
Allow 1.5 inches clearance on each side for plumbing and mounting hardware.
Special Considerations
Countertop Overhang: Granite and quartz countertops need minimum 1-inch overhang beyond cabinet face. Sinks placed too close to the front edge lack adequate support.
Apron Front/Farmhouse Sink Compatibility: These sinks require special cabinet modifications and typically don’t retrofit into standard base cabinets without reconstruction. They work as both undermount and drop-in configurations but need cabinets designed for their installation.
Plumbing Clearance: Measure the location of your water supply lines and drain pipe. Your new sink’s drain hole must align reasonably with existing plumbing. Moving plumbing adds $150-400 to installation costs.
Garbage Disposal Space: If you have or plan to add a garbage disposal, verify at least 12 inches of clearance below the sink drain. Measure from the bottom of the sink to the cabinet floor.
Frequently Asked Questions
Are drop-in sinks outdated?
Drop-in sinks remain functional and appropriate for many kitchens, especially with laminate countertops. They look dated mainly in high-end kitchens with stone countertops where undermount sinks have become standard. For budget renovations and practical applications, drop-in sinks work perfectly well and meet all current plumbing code requirements.
Why do undermount sinks cost more to install?
Undermount installation requires professional skills, specialized epoxy adhesives, mounting hardware systems, and 2-4 hours of skilled labor. The countertop edge needs professional polishing, and installers must ensure proper weight support using brackets or rods. These factors increase costs compared to simple drop-in installation that takes under an hour with basic silicone caulk.
Can I install an undermount sink myself?
Most homeowners lack the tools, experience, and materials for successful undermount installation. The process requires precise positioning, stone-specific epoxy adhesive, proper mounting clip systems, and knowledge of weight distribution requirements. Poor installation leads to sink failure and expensive countertop damage. Professional installation is strongly recommended, with DIY failure rates exceeding 40%.
Do undermount sinks always leak eventually?
Properly installed undermount sinks with quality epoxy adhesive and adequate support systems rarely leak. The seal can last 10-20 years or more with normal use. Leaks result from poor installation, inadequate support brackets, using wrong adhesive types, or extreme heavy sinks. Heavy cast iron sinks and high-use kitchens stress seals more and may need eventual resealing.
Which sink type adds more value to my home?
Undermount sinks in stone countertops increase home value more than drop-in installations. Buyers associate undermount with modern, well-maintained kitchens. Real estate data shows value differences of $2,000-5,000 in mid to high-end homes. In entry-level homes with laminate counters, sink type has minimal impact on resale value.
Final Recommendations For Undermount Vs Drop-In Sink
Both sink types work well when matched to the right situation. Laminate countertops require drop-in sinks. Stone countertops (granite, quartz, marble) showcase undermount installations best. Budget-conscious homeowners and DIY installers benefit from drop-in sinks costing $200-500 total. Long-term homeowners with stone counters gain more value from undermount sinks despite higher $500-900 costs.
Consider your countertop material, budget, cleaning preferences, and DIY ability rather than following trends. Drop-in sinks deliver reliable performance for budget renovations and laminate counters. Undermount sinks provide easier cleaning and modern aesthetics for stone countertops in forever homes.

