Disclosure: This post contains affiliate links and I will be compensated if you make a purchase after clicking through my links. Learn More
Removing a shower head without a wrench is possible. You can do it with basic tools and methods.
Sometimes, you may not have a wrench handy, but need to replace or clean your shower head. The good news is, you don’t always need one to get the job done. There are simple techniques and tools you can use instead.
This guide will show you how to remove your shower head using common items found around the house. With these steps, you can save time and avoid the hassle of searching for a wrench. So, let’s explore how to tackle this task efficiently and safely, ensuring your shower is back in top shape without the need for specialized tools.
Tools And Materials Needed
Removing a shower head without a wrench might sound challenging. It can be easy with the right tools and materials. Many household items can help with this task. Safety precautions are also important to keep in mind. Let’s explore what you need.
Common Household Items
Several everyday items can replace a wrench for this task. A rubber jar opener can provide grip to twist the shower head. Use a thick towel or cloth to protect the fixture. A pair of pliers can help if the shower head is stuck. A few drops of lubricant can loosen tough connections. These items are often found at home.
Safety Precautions
Safety is essential when working with plumbing fixtures. Wear gloves to protect your hands. Ensure the shower is off to prevent water accidents. Check for leaks after removing the shower head. Use a step stool for high fixtures, ensuring it’s stable. Follow these precautions for a safe experience.
Preparing The Shower Area
Preparing the shower area is an important step before removing the shower head. Proper preparation can prevent damage and make the process smoother. Here are some essential steps to get your shower area ready.
Clearing The Space
First, clear the space around the shower. Remove any toiletries, soap dishes, and shampoo bottles. This will give you more room to work. Ensure the area is free of clutter to avoid accidents. You need a clean and open space to move around.
Protecting Surfaces
Next, protect the surfaces in your shower. Lay a towel or a mat on the floor of the shower. This will catch any falling parts and prevent scratches. Cover the faucet and other fixtures with a cloth. This will avoid damage if tools slip during the process. Taking these steps will help keep your shower looking new.
Loosening The Shower Head
Easily remove a shower head without a wrench using household items like rubber gloves or a cloth. Gently twist counterclockwise to loosen and detach it. Ensure a firm grip to avoid slipping.
Loosening a shower head without a wrench might seem tricky at first, but it’s entirely doable with some simple tricks. You don’t need to be a DIY expert or have a toolbox full of tools to succeed at this. With a bit of creativity and a few household items, you can tackle this task with ease.
Using a Rubber Glove
Have you ever thought about using a rubber glove to grip and turn the shower head? It’s an effective and straightforward method. The rubber glove provides extra grip, making it easier to turn the shower head with your bare hands.
Put on a rubber glove and ensure it’s dry. A wet glove can slip and defeat the purpose. Next, grip the shower head firmly and start to turn it counterclockwise. The rubber material enhances your grip, and you’ll likely find the shower head begins to loosen with just a little effort.
Applying a Rubber Band
Another clever trick involves using a rubber band. This technique is particularly useful if the shower head is really stuck. It works by increasing the grip between your hand and the shower head.
Wrap a thick rubber band around the base of the shower head. The band should fit snugly without being too tight. Once wrapped, use your hand to grip over the rubber band and attempt to turn the shower head counterclockwise. The rubber band acts as a cushion, allowing you to apply more force without slipping.
These household hacks can save you time and effort. Have you ever tried these methods before? They might just surprise you with their effectiveness. So next time you’re facing a stubborn shower head, grab a rubber glove or a rubber band and give these techniques a go.
More Alternative Methods
Removing a shower head without a wrench is easy with simple household items. Use a rubber glove for better grip. Or wrap a cloth around the shower head and twist it off gently.
When the trusty wrench is nowhere to be found, removing a shower head can feel like a daunting task. But fear not! There are more alternative methods that can save the day. Whether you’re in a pinch or just want to try something new, these techniques can help you tackle the task with ease.
Using A Zip Tie
Who knew that a simple zip tie could be the hero of this story? Start by wrapping a sturdy zip tie around the base of the shower head where it connects to the pipe. Tighten it enough to get a good grip, but not so tight that it breaks.
Once secure, use the zip tie as a handle to turn the shower head counterclockwise. This method works especially well if the shower head isn’t too tightly screwed on. It’s a surprisingly effective trick that makes you wonder what other common items have hidden potential.
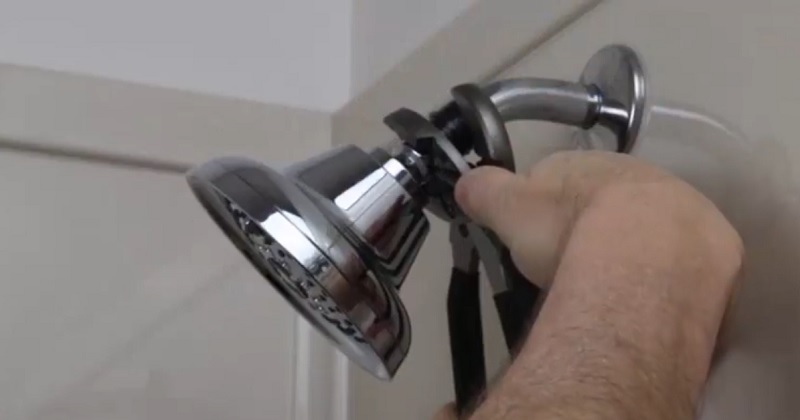
Trying Pliers
If you have a pair of pliers handy, they can be your next best tool. First, wrap a cloth around the shower head to prevent any scratches or damage. Then, clamp the pliers onto the cloth-covered area.
Gently turn the pliers counterclockwise to loosen the shower head. Be careful not to apply too much pressure, as this could damage the fitting. Have you ever used pliers in this unexpected way before? It’s a simple yet clever solution that can save you a trip to the hardware store.
By being resourceful and using what’s available, you can remove that stubborn shower head without a wrench. What other creative solutions have you discovered for home repairs? Share your experiences and empower others to think outside the toolbox!
Removing Stubborn Shower Heads
Removing stubborn shower heads without a wrench is simple. Use a cloth and pliers to loosen the shower head gently. Twist off the shower head by hand, ensuring no damage.
Removing a stubborn shower head can feel like a frustrating chore. It’s common to reach for a wrench, but what if you don’t have one handy? Perhaps you’ve tried twisting it off by hand, only to find it stubbornly stuck in place. Don’t worry—there are effective methods to loosen that pesky shower head without needing specialized tools.
Using Vinegar
Vinegar is more than just a salad dressing ingredient; it’s a powerful cleaning agent. To utilize its power, soak a cloth or plastic bag in white vinegar. Wrap it around the shower head and secure it with a rubber band or string.
Let it sit for a few hours, or overnight if possible. The vinegar works to dissolve mineral deposits that might be causing the shower head to stick. After soaking, try to twist the shower head off by hand. You might be surprised at how easily it comes off.
Applying Heat
Heat can be another effective ally in your quest to remove a stuck shower head. A simple hairdryer can do wonders. Direct the heat at the base of the shower head for a few minutes. The heat causes metal to expand slightly, which might be all you need to loosen it.
While applying heat, be cautious not to overheat the surrounding areas. Once you’ve warmed it up, give the shower head another try. Use a towel to protect your hand from any residual heat. Have you ever tried this method before? It’s a surprisingly simple fix that can save you a trip to the hardware store.
These techniques are great ways to tackle a stubborn shower head without a wrench. They are practical, require minimal effort, and use items you likely already have at home. Why not give them a try next time you’re faced with this common bathroom dilemma?
Cleaning The Pipe
Cleaning the pipe after removing the shower head is crucial. A clean pipe ensures optimal water flow and prevents clogging. Dirt and mineral buildup can affect the shower’s performance. This section will guide you through cleaning the pipe thoroughly.
Removing Debris
Start by removing visible debris from the pipe. Use a soft brush for this task. Gently scrub the inside to loosen dirt. Rinse with warm water to flush out loosened particles. This step clears the way for deeper cleaning.
Checking For Damage
Examine the pipe for any damage after cleaning. Look for cracks or leaks that may cause issues. Use a flashlight to inspect hard-to-see areas. Fix any problems before reattaching the shower head. Ensuring the pipe is intact prevents future complications.
Installing A New Shower Head
You’ve successfully removed your old shower head without a wrench, and now it’s time to install a new one. The process can be straightforward if you choose the right model and follow proper installation steps. Imagine the satisfaction of stepping into a shower with improved water flow and modern design. But how do you ensure your new shower head fits perfectly and functions well?
Choosing The Right Model
Your choice of shower head can dramatically impact your shower experience. Consider models that offer adjustable spray settings, water-saving features, or enhanced pressure. Look for reviews online to see what others say about performance and durability.
If you’ve ever struggled with low water pressure, a model designed to boost flow could be a game-changer. Take a moment to think about your preferences and bathroom style. Do you want a handheld option for flexibility or a fixed head for simplicity?
Proper Installation Steps
Once you’ve chosen the perfect shower head, gather the necessary materials. You’ll need plumber’s tape, a cleaning cloth, and possibly a pair of pliers. Begin by cleaning the shower arm threads to remove any residue or old tape. This ensures a snug fit.
Wrap the plumber’s tape around the threads of the shower arm. This helps prevent leaks by creating a tight seal. Align the new shower head with the shower arm and twist it clockwise. You might be surprised at how easily it screws on without the need for a wrench.
Use your hands to tighten the shower head securely. If needed, gently use pliers to ensure it’s snug. Turn on the water to check for leaks and adjust the spray settings to your liking. Feel the difference in water flow with your new shower head.
Have you ever had a shower head that dripped constantly? Proper installation steps can prevent this annoyance and save water. Share your experience or thoughts on your favorite shower head features in the comments below. Your insights could help someone else make the right choice!
Here is Full guide: How to Install a New Showerhead

Credit: www.reddit.com
Testing The New Shower Head
Removing a shower head without a wrench is possible with simple techniques. Grip the shower head firmly and twist counterclockwise. If needed, use rubber gloves for extra grip.
Testing your new shower head is an exciting step. After successfully removing the old one without a wrench, you’re ready to ensure that the new fixture is functioning perfectly. This process can save you from future hassles and enhance your shower experience. Let’s dive into the essential checks you need to perform once your new shower head is installed.
Checking For Leaks
Inspecting for leaks is crucial. Turn on the water and observe the connection point between the shower arm and head. If you notice any drips, it indicates a loose connection. Hand-tighten the shower head further, and you might want to use a rubber glove to get a better grip.
Leaks can also occur if the Teflon tape isn’t applied properly. Remove the shower head, wrap the threads with fresh Teflon tape, and reattach. A dry connection is the goal, so don’t hesitate to repeat this step until you’re satisfied.
Adjusting Water Flow
Now, let’s talk about water flow. Check if the water flow is consistent and aligns with your preference. Some shower heads come with adjustable settings—try them out to find the perfect pressure.
Consider the water-saving feature as well. If your shower head has this option, test the flow rate to ensure it’s not too restricted or too generous. Personal comfort is key, so adjust until you find what feels right.
Have you ever wondered if your shower head affects your water bill? It might be worth considering. By choosing the right flow rate, you can balance between comfort and efficiency, potentially saving money in the long run.
Testing your new shower head is simple yet effective. By checking for leaks and adjusting the water flow, you’re setting up a pleasant and hassle-free shower experience. Now, each time you shower, you can enjoy the perfect water pressure without worry.
Frequently Asked Questions
How To Loosen A Shower Head Without A Wrench?
Use a cloth to grip the shower head. Twist it counterclockwise by hand. Apply rubber gloves for better grip. Use pliers with a cloth for extra leverage.
What Tool To Use To Take Shower Head Off?
Use an adjustable wrench or pliers to remove a shower head. Ensure you grip it firmly and turn counterclockwise. For stubborn heads, apply penetrating oil to loosen rust or mineral deposits. A cloth can protect the finish. Always turn off water supply before beginning.
How To Remove A Stuck Shower Head Connector?
Use a wrench with a cloth to grip and turn the connector. Apply penetrating oil if it’s still stuck. Gently tap with a hammer to loosen.
How To Loosen Something Without A Wrench?
Use pliers or a pair of adjustable grips to loosen the object. Apply penetrating oil to reduce friction. A rubber strap wrench or a piece of cloth can also provide extra grip. A hammer can gently tap and loosen stuck parts.
Always ensure your safety while attempting these methods.
Final Words
Removing a shower head without a wrench is simple. Just follow the steps. Use common household tools like pliers or rubber gloves. These provide the grip needed. Remember to turn counterclockwise to loosen it. Clean the threads after removal. This ensures a good fit later.
Replace any worn-out parts if needed. Reattach the shower head securely. Test it for leaks and proper flow. You can do this DIY task easily. Save time and money. Enjoy your refreshed shower experience.

