Disclosure: This post contains affiliate links and I will be compensated if you make a purchase after clicking through my links. Learn More
Insulating around pipes in walls is essential to prevent heat loss and water damage. It can save you money on energy bills and protect your home from costly repairs.
Proper insulation helps maintain the temperature of the pipes and prevents them from freezing in winter. It also reduces noise from water flow, making your home quieter. In this blog, we’ll explore the steps to effectively insulate around pipes in walls.
Whether you are a DIY enthusiast or new to home improvement, our guide will help you understand the process. By the end, you’ll have the knowledge to insulate pipes confidently, ensuring your home stays safe and efficient. Let’s get started on making your home more comfortable and secure.
Importance Of Pipe Insulation
Insulating pipes in walls keeps your home warm and energy-efficient. It prevents heat loss and reduces utility bills. Proper insulation also protects pipes from freezing and bursting, ensuring a safe and reliable water supply.
Ensuring proper insulation around pipes in your walls is more than just a routine maintenance task. It’s a vital step that can save you money and headaches in the long run. By insulating your pipes, you protect them from temperature fluctuations, prevent potential damage, and increase your home’s efficiency. Let’s explore why this is so important.
Energy Efficiency
Insulating your pipes can significantly boost your home’s energy efficiency. This means you use less energy to heat water, which translates to lower utility bills. Imagine the savings you could achieve over a year.
Insulated pipes maintain the temperature of the water as it travels through your home. This means your water heater doesn’t have to work as hard to keep water hot. It’s a simple upgrade that can make a noticeable difference in your monthly expenses.
Preventing Frozen Pipes
Frozen pipes are a homeowner’s nightmare, often leading to costly repairs. By insulating your pipes, you reduce the risk of them freezing during cold spells. Have you ever faced the stress of a burst pipe in the dead of winter?
Proper insulation acts as a protective barrier, keeping your pipes safe from freezing temperatures. This is especially important in unheated areas like basements and attics.
Insulating your pipes is a practical and easy way to safeguard your home from potential damage. So why wait for a problem to arise? Take action now to enjoy peace of mind and savings.
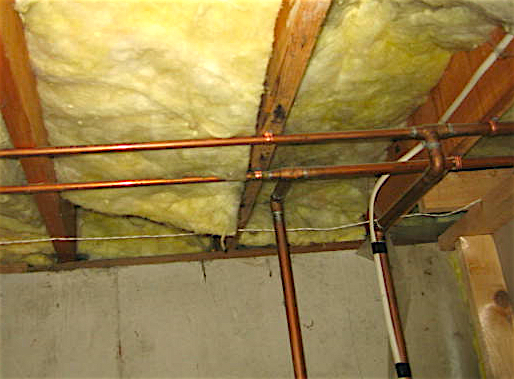
Credit: www.nachi.org
Types Of Insulation Materials
Choosing the right insulation material is crucial for effective pipe insulation. Different materials offer unique benefits. Understanding these materials helps in making the best decision. Proper insulation prevents heat loss and saves energy. It also protects pipes from freezing in cold weather.
Foam Insulation
Foam insulation is a popular choice for pipes. It’s lightweight and easy to install. Foam sleeves fit snugly around pipes. They provide excellent thermal insulation. This type of insulation is also moisture-resistant. It reduces the risk of mold growth. Foam insulation is available in various sizes. It suits different pipe diameters. The material is affordable and durable. It offers long-lasting protection for pipes.
Fiberglass Insulation
Fiberglass insulation is another effective option. It consists of fine glass fibers. This material provides superior thermal resistance. It’s ideal for both hot and cold pipes. Fiberglass insulation is also fire-resistant. It offers an added safety benefit. Installation requires cutting the material to fit. It’s available in pre-cut sleeves and rolls. Ensure proper sealing at joints for maximum efficiency. Fiberglass is a versatile and reliable choice.
Tools And Materials Needed
Gather insulation foam, pipe wrap, measuring tape, utility knife, and protective gloves. Ensure all tools are within reach.
When tackling the task of insulating around pipes in walls, having the right tools and materials is crucial. This section will guide you through the essential items you’ll need to get the job done efficiently and safely. With a well-prepared toolkit, you can ensure that your insulation project is both effective and long-lasting.
###
Essential Tools
Before you start, gather all necessary tools. A utility knife is vital for cutting insulation materials to the right size. Ensure you have a tape measure to accurately gauge dimensions.
A staple gun comes in handy to secure insulation batts, especially in tight spaces. Don’t forget a caulking gun for applying sealant around the pipes to prevent air leaks.
If you’re working with foam pipe insulation, scissors or a pipe cutter will help you achieve clean cuts. Keeping these tools within reach can save you time and frustration.
###
Safety Equipment
Safety should always be a priority. Wear safety goggles to protect your eyes from dust and debris. Insulation materials can irritate the skin, so gloves are essential.
A dust mask will prevent inhalation of harmful particles, especially if you’re cutting or handling fiberglass insulation. Long sleeves and pants offer extra protection against skin irritation.
Having a first aid kit nearby is a good idea in case of minor cuts or scrapes. Safety doesn’t take a break, so ensure you’re fully equipped before starting your project.
Have you ever started a project only to realize you missed a crucial tool? Avoid unnecessary delays by checking off these items before you begin.
Preparing The Work Area
Clear the work area before insulating around pipes in walls. Remove obstacles and ensure good lighting. Gather necessary tools and materials for an efficient process.
Preparing to insulate around pipes in walls is crucial for ensuring a job well done. This preparation phase is not just about gathering tools but setting the stage for a smooth and efficient process. By organizing your work area, you minimize disruptions and maximize your effectiveness.
###
Clearing The Space
Before you start, ensure the space around your pipes is clear of any obstacles. Move furniture, decorations, or any other items that might be in the way. This not only gives you a better view but also prevents accidents.
Consider this: a cluttered space can lead to mistakes or even injuries. Have you ever tripped over a stray object while focused on a task? By keeping your area tidy, you reduce such risks.
###
Identifying Pipe Locations
Locating the exact position of your pipes is essential. Use a stud finder or a similar tool to detect where pipes are behind the wall. This step saves you from unnecessary wall damage and ensures precise insulation.
Think about your last DIY project. Did you spend more time searching for tools than doing the actual work? Knowing exactly where your pipes are can significantly cut down on wasted time and effort.
Taking the time to properly prepare can make the insulation process smoother and more efficient. Are you ready to take on the challenge with a clear and organized approach?
Measuring And Cutting Insulation
Ensure snug insulation around pipes in walls by measuring accurately and cutting carefully. This prevents heat loss and potential freezing. Properly fitted insulation enhances energy efficiency and protects your home.
Insulating around pipes in walls is a crucial step to maintain energy efficiency and prevent damage from condensation or freezing. A significant part of this process is measuring and cutting the insulation material accurately. This ensures a snug fit that maximizes the insulation’s effectiveness. But how do you go about doing that with precision? Let’s dive into the specifics of measuring and cutting insulation, so you can do it right the first time.
Accurate Measurements
Start by gathering your tools: a tape measure, a notepad, and a pencil. Measure the diameter and length of the pipes you need to insulate. Jot down these numbers; accuracy here can save you from costly mistakes later.
Remember, even a small miscalculation can lead to gaps in insulation, which could result in energy loss. Double-check your measurements to ensure they’re precise. This is not just about numbers; it’s about the comfort and efficiency of your home.
Cutting Techniques
Once you’ve got your measurements, it’s time to cut the insulation material. Use a sharp utility knife or specialized insulation cutter for clean cuts. Lay the insulation on a flat surface, and mark your measurements clearly.
Cut in a single, steady motion to avoid jagged edges. These can lead to improper fits, which compromise insulation effectiveness. Practice on a scrap piece if you’re new to this, and soon you’ll be cutting like a pro.
Mistakes can happen, but they’re opportunities to learn. Did you know that a simple error in cutting can double your work? Keep your tools sharp and your mind sharper to avoid such setbacks.
Insulating around pipes might seem like a small task, but it’s one that can save you from larger issues down the line. What tips do you have for measuring and cutting insulation? Share your experiences and help others perfect their technique!

Credit: www.youtube.com
Installing Foam Insulation
Foam insulation around pipes in walls helps prevent heat loss and condensation. Simply apply spray foam around the pipes to seal gaps. This method keeps your home energy-efficient and reduces the risk of damage.
Insulating around pipes in walls is crucial to maintain energy efficiency and prevent potential damage from freezing temperatures. Installing foam insulation is a straightforward and effective way to achieve this. Foam insulation provides a snug fit around the pipes, reducing heat loss and minimizing the risk of condensation that can lead to mold growth. You might be surprised at how simple and impactful this process can be.
Do you ever wonder if your pipes are protected enough?
###
Wrapping Pipes
Begin by measuring the length and diameter of the pipes you wish to insulate. You can use foam pipe insulation sleeves, which come pre-slit for easy application. Cut the foam to match the length of your pipes. Slide the foam sleeve around the pipe, ensuring it envelops the entire surface.
Don’t worry if it seems too easy—you’re on the right track.
###
Securing Insulation
Once the foam is in place, securing it properly is essential. Use plastic zip ties or specialized pipe insulation tape to keep the foam snug against the pipe. Space them evenly to ensure the insulation doesn’t slip off over time.
Imagine the peace of mind knowing those pipes are secure.
Consider using additional sealant where the foam meets other surfaces to prevent any air leaks. This might seem like an extra step, but it can make a significant difference in efficiency.
Ever thought about how such simple actions could save on energy bills?
By following these steps, you ensure your pipes are better protected and your home remains cozy, even in the coldest months.
Installing Fiberglass Insulation
Insulating around pipes in walls is crucial for energy efficiency. Fiberglass insulation is a common choice for this task. It helps maintain indoor temperatures and prevent freezing pipes. This type of insulation is easy to install and provides excellent thermal resistance.
Before starting, gather your materials. You will need fiberglass insulation, a utility knife, and protective gear. Safety is important. Wear gloves and a mask to avoid irritation.
Applying Insulation
Start by measuring the space around the pipes. Cut the fiberglass insulation to fit the measured area. Use a utility knife for clean cuts. Carefully place the insulation around the pipes. Ensure it covers all sides evenly.
Press the insulation gently into the wall cavity. This ensures it stays in place. Check for any gaps or uneven coverage. Fill these areas to ensure proper insulation.
Sealing Gaps
After placing the insulation, inspect for gaps. These can reduce the effectiveness of your insulation. Use caulking to seal any small openings. This prevents air leaks and maximizes insulation efficiency.
For larger gaps, use expanding foam. Spray foam fills spaces and creates an airtight seal. Allow the foam to dry completely before checking its coverage. Proper sealing enhances energy savings and pipe protection.
Inspecting And Testing
Proper insulation around pipes in walls is essential for energy efficiency. After insulating, inspect and test the area for any issues. This ensures that the insulation works effectively. It also prevents heat loss and potential water damage.
Checking For Gaps
Start by examining the insulation for visible gaps. Gaps allow air to escape and reduce the insulation’s effectiveness. Feel around the pipe area with your hand. Look for drafts or temperature differences. Use a flashlight to spot any hidden gaps or spaces. Pay attention to corners and tight spots. These areas are more prone to gaps.
Ensuring Effectiveness
Once you check for gaps, test the insulation’s effectiveness. This step is crucial to ensure your work pays off. Use a thermal imaging camera to detect cold spots. This tool helps identify any weak points in the insulation. Alternatively, use a thermometer to measure temperature differences. Compare readings from insulated and non-insulated areas. This will show if the insulation is working properly.
Frequently Asked Questions
How Do You Insulate Walls Around Pipes?
Insulate walls around pipes by using foam pipe insulation. Seal gaps with spray foam or caulk. Wrap pipes with fiberglass or foam sleeves to prevent heat loss. Ensure insulation fits snugly around pipes to maximize efficiency. Use vapor barriers to prevent moisture buildup and enhance insulation performance.
Should You Put Insulation Around Pipes?
Yes, you should insulate pipes. Insulation prevents freezing, reduces energy costs, and minimizes heat loss. Properly insulated pipes are more efficient.
How To Keep Pipes In A Wall From Freezing?
Insulate pipes to prevent freezing inside walls. Seal cracks and openings to block cold air. Keep the thermostat consistent. Allow warm air to circulate by opening cabinet doors. During extreme cold, let faucets drip slightly to maintain water flow.
Is It Okay To Put Expanding Foam Around Pipes?
Yes, it’s okay to use expanding foam around pipes. Ensure it’s the correct type for plumbing, to prevent damage.
Final Words
Insulating around pipes in walls is crucial for energy efficiency. It helps reduce heat loss and prevents freezing. Always choose the right insulation material for your pipes. Measure the space accurately to avoid gaps. Proper installation ensures long-lasting protection. Regular checks can prevent future issues.
Remember, small efforts lead to big savings. Insulation keeps your home comfortable year-round. Don’t overlook this important task. It’s simple, yet effective. Ready to start? Your pipes will thank you. Keep your home warm and safe. Enjoy the benefits of well-insulated pipes.

