Disclosure: This post contains affiliate links and I will be compensated if you make a purchase after clicking through my links. Learn More
Are you tired of stepping into the shower only to be greeted by low water pressure or uneven spray? Your shower head might be the culprit, clogged with mineral deposits and grime.
You might think cleaning it requires dismantling it, but there’s good news: you don’t need to take it off! Imagine transforming your daily shower into a spa-like experience with just a few simple steps. Intrigued? You’ll discover easy and effective ways to clean your shower head without the hassle of removing it.
Stick around, and you’ll learn how to restore your shower’s performance effortlessly, using items you probably already have at home. Your showers are about to become a refreshing, invigorating escape, and it all starts with a clean shower head. Keep reading to find out how!
Common Causes Of Shower Head Blockage
Shower heads can get clogged over time. Minerals in water build up inside. This causes water flow to slow down. Understanding the causes of blockage helps in cleaning.
Hard Water Deposits
Hard water contains minerals like calcium. These minerals leave deposits inside the shower head. Over time, these deposits block water flow. Regular cleaning keeps deposits in check.
Rust Formation
Metal parts inside the shower head can rust. Rust forms due to moisture and air exposure. It can block small holes in the shower head.
Soap Scum Buildup
Soap used during showers can create scum. This scum sticks to shower head parts. It can block water flow if not cleaned.
Mineral Buildup
Besides calcium, other minerals also collect inside. Magnesium and iron are common culprits. They form a hard crust that blocks water.
Mold And Mildew
Mold thrives in damp environments. Mildew can form inside the shower head. This can block water and cause health issues.
Debris And Dirt
Small particles can enter the shower head. They collect and block the water flow. Cleaning removes these particles easily.
Credit: www.tiktok.com
Benefits Of Regular Shower Head Cleaning
Regular shower head cleaning offers numerous advantages. It enhances water flow and extends the lifespan of the shower head. Clean shower heads also prevent the buildup of harmful bacteria. This practice improves your shower experience and promotes better hygiene.
Enhances Water Flow
Over time, mineral deposits clog shower heads. This reduces water pressure. Regular cleaning removes these deposits. It ensures a strong, consistent water flow. A powerful shower makes every bath enjoyable.
Improves Hygiene
A dirty shower head harbors bacteria. This can lead to skin problems. Regular cleaning eliminates these germs. It ensures a safe and clean shower every time.
Extends Shower Head Lifespan
Minerals and grime can corrode your shower head. This reduces its lifespan. Routine cleaning prevents this damage. It helps the shower head last longer, saving money on replacements.
Prevents Mold And Mildew
Moist environments promote mold growth. Shower heads are no exception. Regular cleaning keeps mold and mildew at bay. It maintains a fresh and healthy bathroom environment.
Materials Needed For Cleaning
Gather white vinegar, a plastic bag, and a rubber band for cleaning. Fill the bag with vinegar and secure it over the shower head. Let it soak overnight for sparkling results.
Cleaning a shower head without taking it off might seem tricky, but it’s absolutely doable with the right materials. You probably have most of these items at home, which makes this task not only easy but also budget-friendly. Let’s dive into what you’ll need to get your shower head sparkling clean.
1. White Vinegar
White vinegar is your best friend in tackling mineral deposits and grime. Its acidic nature helps break down the gunk without any harsh chemicals. You might wonder, how does something so simple work so effectively? It’s all about the vinegar’s ability to dissolve calcium build-up, leaving your shower head looking as good as new.
2. Plastic Bag
A sturdy plastic bag is essential for this cleaning method. You’ll use it to hold the vinegar around the shower head. Make sure it’s large enough to fit snugly over the shower head and secure it tightly. This allows the vinegar to do its magic without any mess.
3. Rubber Band Or String
To keep the plastic bag in place, you’ll need a rubber band or some string. It’s a simple solution to ensure your cleaning concoction stays put. Ever had that moment where you rig something up, and it surprisingly holds strong? That’s what you’ll achieve here.
4. Baking Soda (optional)
Baking soda can add an extra punch to your cleaning routine. Mixed with vinegar, it creates a fizzing action that can tackle stubborn spots. It’s like giving your shower head a spa treatment.
5. Old Toothbrush Or Soft Brush
An old toothbrush or soft brush is perfect for scrubbing away any remaining residue. Once the vinegar has loosened the grime, a gentle scrub can finish the job. Imagine the satisfaction of seeing those last bits of dirt vanish under your brush.
6. Warm Water
After soaking and scrubbing, you’ll need warm water to rinse off the vinegar and debris. It’s the final step to reveal a gleaming shower head. Think about how refreshing it feels to step into a shower with a clean head, knowing you did it yourself.
Doesn’t this list make you want to roll up your sleeves and get started? With these materials, you can transform your shower head from grimy to gleaming without the hassle of taking it off. Wouldn’t it be great to tackle this task and enjoy the results every time you shower?
Credit: showers.waterpik.com
Using Vinegar For Cleaning
Using vinegar to clean your shower head is a simple method. Vinegar is a natural cleaning agent that removes mineral deposits and grime. It’s effective and inexpensive. You won’t need to remove the shower head. This method is ideal for regular maintenance and keeps your shower head performing well. Let’s dive into the steps for a vinegar soak and explore its advantages.
Steps For Vinegar Soak
First, fill a plastic bag with vinegar. Ensure the bag is large enough to cover the shower head completely. Secure the bag over the shower head with a rubber band or zip tie. Leave it to soak for a few hours. The vinegar works to dissolve mineral deposits and unclog the nozzles. After soaking, remove the bag carefully. Turn on the shower to rinse away vinegar and loosened debris. Wipe the shower head with a cloth for a shiny finish.
Advantages Of Vinegar Cleaning
Vinegar is eco-friendly and non-toxic. It doesn’t harm the environment or your family. It’s easy to use and requires no specialized tools. Vinegar cleaning removes hard water stains effectively. It improves water flow by clearing clogged nozzles. This method saves time and effort. Regular cleaning prolongs the life of your shower head. Clean shower heads look good and function better. Vinegar cleaning keeps them in top condition.
Baking Soda And Vinegar Mixture
Easily clean your shower head without removing it using baking soda and vinegar. Mix them in a plastic bag. Secure the bag around the shower head and let it soak overnight.
Cleaning your shower head without taking it off can be a breeze with a simple baking soda and vinegar mixture. This method is a game-changer because it’s easy, affordable, and uses items you likely already have at home. If you’ve been struggling with hard water stains or soap scum, this DIY solution can save you time and effort.
Creating The Mixture
Start by gathering your ingredients. You’ll need about half a cup of baking soda and a cup of vinegar. These quantities work well for most shower heads, but you can adjust as needed. In a small bowl, combine the baking soda with a little water to make a paste.
Then, slowly add the vinegar. Be prepared for some fizzing—it’s normal and shows the mixture is active. Once the fizzing subsides, transfer the mixture into a plastic bag. Ensure the bag is large enough to cover your shower head completely.
Application Process
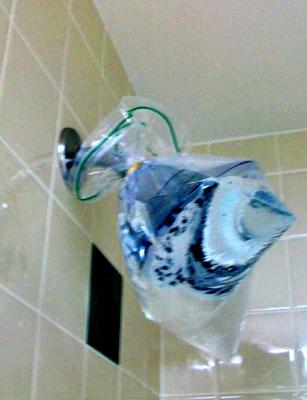
Now, it’s time to apply your homemade cleaning solution. Carefully attach the bag filled with the mixture to your shower head. Use a rubber band or a twist tie to secure it in place. Let it sit for at least two hours. If your shower head has a lot of build-up, consider leaving it overnight for maximum effect.
After the soaking period, remove the bag and dispose of the solution. Run hot water through the shower head for a few minutes to flush out any remaining residue. Have you ever noticed how a clean shower head can enhance your entire shower experience? This simple trick can make a world of difference.
:strip_icc()/placing-bag-of-solution-over-shower-head-cfe9cd0e-4c1c90034fcf4a7298369d054622b640.jpg)
Credit: www.bhg.com
Commercial Cleaning Solutions
Easily clean your shower head without removing it using vinegar. Fill a plastic bag with vinegar. Secure it around the shower head with a rubber band. Let it soak overnight. Rinse in the morning for a sparkling finish.
Cleaning a shower head without removing it is possible with commercial cleaning solutions. These products are designed to dissolve mineral deposits and grime effectively. They save time and effort, offering a convenient solution for shower head maintenance.
Choosing The Right Product
Selecting the best cleaner is crucial. Look for solutions that target lime and calcium buildup. Some products are specifically formulated for shower heads. Check the label for compatibility with your shower head material. Ensure the product is safe for chrome, stainless steel, or plastic. Reading reviews can help in choosing a reliable option.
Application Tips
Applying the cleaning solution correctly is essential. First, fill a plastic bag with the cleaner. Secure it around the shower head with a rubber band or string. Make sure the solution completely covers the shower head. Leave it for the recommended time, usually 30 minutes.
After soaking, remove the bag and wipe the shower head with a cloth. Rinse thoroughly with warm water. Repeat if necessary for stubborn deposits. Using commercial cleaning solutions can simplify shower head cleaning. It’s an effective method that maintains the efficiency of your shower.
Using A Toothbrush For Scrubbing
Cleaning your shower head can seem like a daunting task, especially if you think you need to dismantle it. But did you know that you can achieve a sparkling clean shower head using just a toothbrush? This simple tool can be surprisingly effective, allowing you to reach those tiny crevices where grime tends to hide. You don’t need fancy gadgets; sometimes, a toothbrush is all it takes to get the job done.
Effective Scrubbing Techniques
Using a toothbrush for scrubbing is all about technique. Start by dipping your toothbrush in a cleaning solution, such as a mixture of vinegar and water. This helps to loosen stubborn mineral deposits.
Apply gentle pressure as you scrub the shower head. The bristles of the toothbrush are perfect for targeting build-up without scratching the surface. Remember, patience is key. A few minutes of steady scrubbing can make a noticeable difference.
Have you ever considered how much grime can accumulate on your shower head? Regular scrubbing might reveal a cleaner shower than you thought possible.
Areas To Focus On
When cleaning with a toothbrush, focus on the nozzles of the shower head. These are the primary areas where mineral deposits tend to accumulate and block water flow.
Also, pay attention to the edges and the back of the shower head. These areas often get neglected but can harbor grime just as easily.
Don’t overlook the joints where the shower head connects to the pipe. You might be surprised at the difference a clean connection can make in water pressure.
Have you tried cleaning your shower head with a toothbrush? Share your experience in the comments below. You might just inspire someone to try it themselves!
Preventing Future Build-up
Keeping your shower head clean means less scrubbing. Regular maintenance helps extend its lifespan. It ensures a steady water flow. Preventing mineral build-up saves you time and effort. Let’s explore some effective strategies.
Regular Maintenance Tips
Wipe the shower head weekly. Use a soft cloth to remove any residue. Vinegar is a great cleaning agent. Spray it on the shower head. Let it sit for a few minutes. Rinse with warm water to remove the vinegar. This simple routine keeps build-up at bay.
Use Of Water Filters
Install a water filter in your shower. It reduces minerals and impurities. Filters can limit calcium deposits. Clean water means a cleaner shower head. Change the filter as recommended. This keeps it effective and your shower head in top shape.
Frequently Asked Questions
How Do I Clean A Shower Head With Vinegar?
Fill a plastic bag with vinegar. Tie it around the shower head. Leave it overnight. Rinse well the next day.
Can I Use Baking Soda To Clean Shower Head?
Yes, mix baking soda with water. Make a paste. Apply to shower head. Let it sit for 30 minutes. Rinse thoroughly.
What Household Items Clean Shower Head Effectively?
Use vinegar, baking soda, or lemon juice. They break down mineral deposits. Easy and affordable. Safe for most shower heads.
How Often Should I Clean My Shower Head?
Clean every three months. More often if water pressure decreases. Regular cleaning prevents buildup. Keeps shower head working well.
Final Words
Cleaning your shower head is simple and effective. No need to remove it. Just follow the steps outlined in this guide. Use vinegar or baking soda for a natural clean. These methods help maintain water flow and hygiene. Regular cleaning keeps your shower fresh and enjoyable.
Remember, a clean shower head means a better shower experience. Make it a routine for best results. Enjoy your clean and refreshing showers. Stay consistent with your cleaning efforts. Your bathroom will thank you. Happy cleaning!