Disclosure: This post contains affiliate links and I will be compensated if you make a purchase after clicking through my links. Learn More
Are you tired of dealing with a toilet that just doesn’t cut it anymore? Maybe it’s constantly running, leaking, or just plain outdated.
Whatever the reason, installing a new toilet might seem daunting at first. But guess what? You can do it yourself, and it’s easier than you think! Imagine the satisfaction of fixing up your bathroom all on your own. With our step-by-step guide, you’ll have your new toilet up and running in no time, saving you the hassle and cost of hiring a plumber.
Ready to transform your bathroom and boost your DIY confidence? Let’s dive into how you can install a new toilet with ease.
Credit: www.youtube.com
Gather Necessary Tools
Start by gathering essential tools like a wrench, screwdriver, and a level. This ensures a smooth toilet installation process. Having all tools on hand saves time and prevents interruptions.
Installing a new toilet can be a straightforward task if you prepare well. The first step to a smooth installation is gathering the right tools. Having the necessary tools at your fingertips saves time and frustration. It also ensures that you don’t have to make multiple trips to the hardware store.
Essential Tools Checklist
Before you begin, check off these essential tools from your list. You’ll need a wrench to tighten bolts and a screwdriver for removing the old toilet seat. A tape measure will help ensure accuracy in fitting your new toilet. A hacksaw might come in handy if you need to adjust the length of the bolts. A bucket is useful to catch any water left in the old toilet tank. Finally, don’t forget a sponge or rag to clean up any water spills.
Safety Equipment
Safety should be your priority. Keep a pair of gloves ready to protect your hands from sharp edges or dirty surfaces. Goggles are essential for shielding your eyes from debris and splashes. You might think that a mask is excessive, but it can help you avoid inhaling dust if you need to cut any parts.
Do you want to ensure your safety while installing? Make sure your workspace is well-lit and ventilated. This not only helps in seeing what you’re doing but also keeps you comfortable during the process. Having all these tools and safety gear prepared will streamline your installation process.
Can you imagine the frustration of discovering halfway through that you’re missing a vital tool? You can avoid this by checking your checklist and gathering everything in advance.
:max_bytes(150000):strip_icc()/toilet-replacement-1824910-06-eb4dfac312c74af3b9732ff9417cbd02.jpg)
Credit: www.thespruce.com
Choose The Right Toilet
Installing a new toilet can seem daunting, but choosing the right one is half the battle. A misfit toilet can lead to discomfort and inefficiency, so it’s crucial to select wisely. Let’s dive into the essentials of choosing the right toilet for your bathroom. You’ll be surprised how a simple decision can transform your daily routine and ensure your space is utilized effectively.
Types Of Toilets
Toilets come in various styles, each offering unique features. Consider the standard two-piece toilet, where the tank and bowl are separate. They are the most common, often more affordable, and easier to replace parts.
Alternatively, one-piece toilets offer a sleek design, making cleaning a breeze. They often come with higher price tags but bring a touch of elegance to your bathroom.
Wall-mounted toilets save space and provide a modern look. They require more complex installation but offer the benefit of adjustable height.
Think about what style fits your needs and budget. Sometimes, investing a bit more upfront can lead to long-term satisfaction.
Selecting Based On Space
Your bathroom’s layout plays a crucial role in your toilet choice. A cramped bathroom might benefit from compact designs like round bowls, which take up less space.
If space allows, elongated bowls provide extra comfort. They might not fit in tight corners, but they offer a better seating experience.
Consider the distance from the wall and other fixtures. Measure twice, choose once. Remember, a toilet that fits well enhances the overall flow of the bathroom.
Have you ever squeezed into a tight bathroom space just to find that the toilet feels awkward? Prioritize measuring your space before shopping to avoid this common pitfall.
Choosing the right toilet is more than picking a style; it’s about ensuring comfort and efficiency. By focusing on the type and space, you set the stage for a successful installation. What other factors do you consider essential when selecting a toilet?
Prepare The Area
Clear the space around the toilet area to ensure easy movement. Remove any items that could obstruct installation. Ensure the floor is dry and clean to prevent slipping.
Preparing the area is a crucial first step in installing a new toilet. This ensures a smooth installation process. Proper preparation helps avoid issues later. Let’s break down the steps for a successful installation.
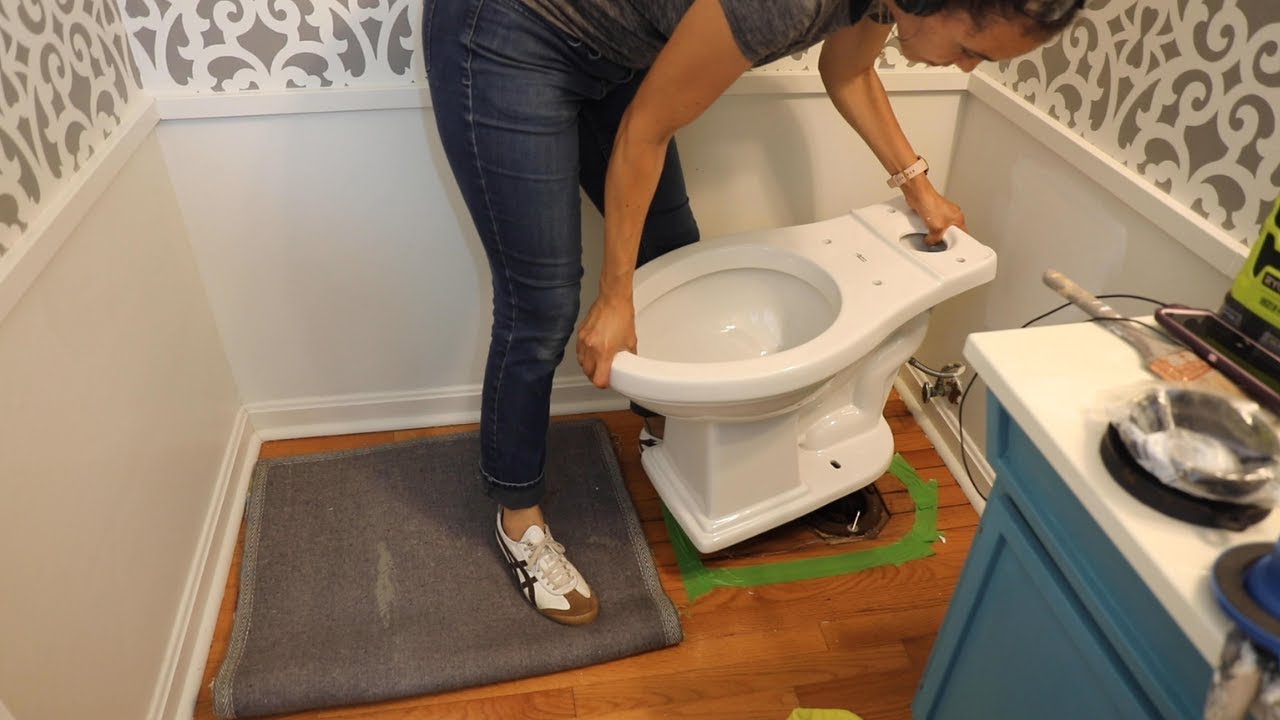
Remove The Old Toilet
Turn off the water supply. This prevents leaks and mess. Flush the toilet to empty the tank. Use a sponge to soak up any remaining water. Disconnect the water supply line. Use a wrench if needed. Unscrew the nuts holding the toilet to the floor. Gently rock the toilet to break the seal. Lift the toilet and set it aside. Clean the area thoroughly. Remove the old wax ring and dispose of it.
Inspect The Plumbing
Check the floor for damage. Ensure it’s strong enough to hold a new toilet. Inspect the flange for cracks or rust. Replace it if necessary. Check the water supply line. Look for leaks or wear. Replace old or damaged lines. Ensure the shut-off valve functions properly. Tighten any loose connections. Make sure everything is ready for the new toilet.
Install The Wax Ring
Installing a new toilet can seem daunting, but it’s manageable. One crucial step is installing the wax ring. This small component creates a watertight seal between the toilet and the drainpipe. Understanding how to properly install the wax ring is vital for preventing leaks and ensuring a secure fit.
Types Of Wax Rings
Wax rings come in various types. Standard wax rings are the most common choice. They are simple, effective, and affordable. Some rings include a plastic flange. This adds extra stability. Other options offer a wax-free design. These use rubber gaskets for those who prefer less mess. Consider your bathroom setup before choosing.
Positioning The Ring
Correct positioning is essential. Start by cleaning the flange area. Remove any old wax residue. Place the new wax ring on the toilet outlet. Center it carefully for a snug fit. Slowly lower the toilet onto the flange. Press down to ensure a tight seal. A properly positioned ring prevents leaks.
Position The Toilet
Positioning the toilet correctly is essential for a successful installation. A misaligned toilet can lead to leaks and unstable fixtures. With careful attention, you can ensure a perfect fit.
Aligning The Toilet
Start by placing the toilet on the flange. Ensure the toilet’s outlet aligns with the flange opening. Check that the toilet is centered over the flange. Make small adjustments until it sits evenly.
Use a level to check its position. It should be perfectly horizontal. Adjust if necessary to avoid future problems.
Securing The Bolts
Once aligned, secure the toilet with bolts. Place a washer on each bolt. Insert them through the toilet’s base holes into the flange. Tighten the nuts carefully with a wrench.
Ensure the toilet is firmly attached. Avoid over-tightening to prevent cracking. Check stability by gently rocking the toilet. It should remain steady.
Ensure the bolts are tight but not too tight. This step ensures the toilet remains stable. Double-check each bolt for security.
Connect Water Supply
Installing a new toilet involves connecting the water supply securely. Ensure the water shut-off valve is off before starting. Attach the water line from the valve to the toilet tank, checking for tight connections to prevent leaks.
Connecting the water supply to your new toilet is a crucial step that ensures it functions properly. It’s not just about twisting a few pipes together; it’s about making sure everything is secure and leak-free. This task might seem daunting, but with a little patience and attention to detail, you can handle it like a pro. Remember, the goal is to make sure your bathroom stays dry and your toilet fills correctly after each flush.
Attach Water Line
Start by identifying the water supply line that you’ll connect to the toilet. This line is usually flexible and made of braided steel, which allows for easy maneuvering. Ensure that the shut-off valve is completely closed to prevent any water flow while you work.
This is crucial for avoiding messy situations. Carefully attach the water supply line to the fill valve on the underside of the toilet tank. Tighten it by hand first, then use a wrench for a snug fit, but be cautious not to over-tighten which might damage the fittings.
Check For Leaks
Once the water line is attached, turn the shut-off valve back on slowly. This gradual process helps prevent sudden water pressure from causing leaks. Observe the connection point closely and watch for any drips. It’s normal to feel a moment of suspense here, wondering if your handiwork will hold up. If you notice leaks, tighten the connections a bit more.
Sometimes, a small adjustment is all that’s needed. Ask yourself: Would you rather spend a few extra minutes now ensuring everything is perfect, or face a mini flood later when you least expect it? Your diligence now can save a lot of hassle and water damage down the line.
Adjust And Test
You’ve successfully mounted your new toilet, but the installation isn’t quite complete until you adjust and test its functionality. This crucial step ensures that your toilet operates smoothly and efficiently. It’s time to fine-tune the flush mechanism and check for any leaks or issues in performance. With a few simple adjustments and tests, you can rest easy knowing your bathroom upgrade is both effective and durable.
Adjusting Flush Mechanism
Start by removing the toilet tank lid. Inside, you’ll find the flush mechanism, which might include a float, flapper, and fill valve. Your goal is to ensure the float is correctly positioned to regulate water levels. If the water is too high or low, gently slide the float up or down the fill valve’s stem.
Check the flapper too. It should sit snugly over the flush valve to prevent leaks. If it seems loose, adjust the chain length connected to the flush lever until the flapper closes tightly without any slack. This ensures a strong and efficient flush every time.
Testing For Proper Operation
Now that adjustments are complete, it’s time to test your toilet’s operation. Flush the toilet and observe the water flow. Is the flush powerful? Does the tank refill quickly without any odd noises? These are signs of a well-functioning toilet.
Inspect the area around the base and connections for leaks. A dry floor means your installation is leak-free. If you notice any dampness or water pooling, you may need to tighten the bolts or check the seals.
Have you ever installed a toilet only to find a slow or weak flush? It’s not uncommon, but addressing the flush mechanism and testing for proper operation can prevent this issue. How confident are you in your installation skills now? With practice, you’ll become adept at ensuring your toilet runs perfectly with every flush.
By giving attention to these details, you’re not just installing a toilet; you’re enhancing the functionality of your home. Embrace the satisfaction of a job well done, knowing you’ve tackled a project many find daunting. What’s your next home improvement adventure?

Credit: www.homedepot.com
Finishing Touches
Congratulations! You’ve almost completed your toilet installation project. The finishing touches are crucial. They ensure your new toilet is secure, functional, and looks great. This final stage involves sealing the base and installing the toilet seat. Let’s dive into these steps to achieve a professional finish.
Seal Base Of Toilet
Sealing the base prevents leaks and keeps your bathroom clean. Use a high-quality silicone sealant. Begin by applying a thin bead of sealant around the toilet base. Ensure you cover the entire perimeter. This step keeps water from seeping underneath. It also gives your toilet a polished look.
Let the sealant dry completely. Follow the instructions on the sealant package. Usually, it takes about 24 hours. Once dry, test the seal by flushing the toilet. Check for any leaks. A proper seal ensures long-lasting performance.
Install Toilet Seat
Now, it’s time to install the toilet seat. Align the seat with the bolt holes on the toilet. Insert the bolts through the holes. Secure the seat by tightening the nuts underneath. Make sure the seat is firm and doesn’t wobble.
Some toilet seats come with quick-release hinges. These make cleaning easier. Check the manufacturer’s instructions for specific installation steps. Adjust the seat for comfort and alignment. With these simple steps, your toilet is ready for use.
Frequently Asked Questions
What Tools Do I Need To Install A Toilet?
You’ll need a wrench, screwdriver, tape measure, and a level. Also, a new wax ring and supply line.
How Do I Remove The Old Toilet?
Turn off water. Flush to empty tank. Unscrew bolts. Lift off toilet carefully. Dispose properly.
How Long Does It Take To Install A Toilet?
Typically, it takes about 2-3 hours. Experience level affects time. Don’t rush.
Can I Install A Toilet Myself?
Yes, it’s possible. Basic plumbing skills help. Follow instructions carefully. Ask for help if needed.
Final Words
Installing a new toilet might seem tricky, but you can do it. Follow each step carefully, and soon you’ll have a working toilet. Gather your tools and double-check instructions as you go. Remember, patience is key. Each step brings you closer to a great result.
With practice, this process becomes simpler. You’ll save time and feel accomplished. Plus, you gain a useful skill for the future. Enjoy your new toilet and the satisfaction of doing it yourself. If needed, don’t hesitate to ask for help.
Happy plumbing!

