Disclosure: This post contains affiliate links and I will be compensated if you make a purchase after clicking through my links. Learn More
Replacing a wax ring on a toilet is essential for preventing leaks. It might seem tricky, but it’s manageable with the right guidance.
A faulty wax ring can cause water damage and unpleasant odors. Learning how to replace it yourself can save money and time. Whether you’re a seasoned DIY enthusiast or a beginner, this guide will walk you through each step. We’ll break down the process into clear, simple instructions.
You’ll gain confidence in handling this common home repair task. Plus, you’ll understand why a properly sealed toilet is crucial for a healthy home environment. Ready to tackle this plumbing project? Let’s get started!

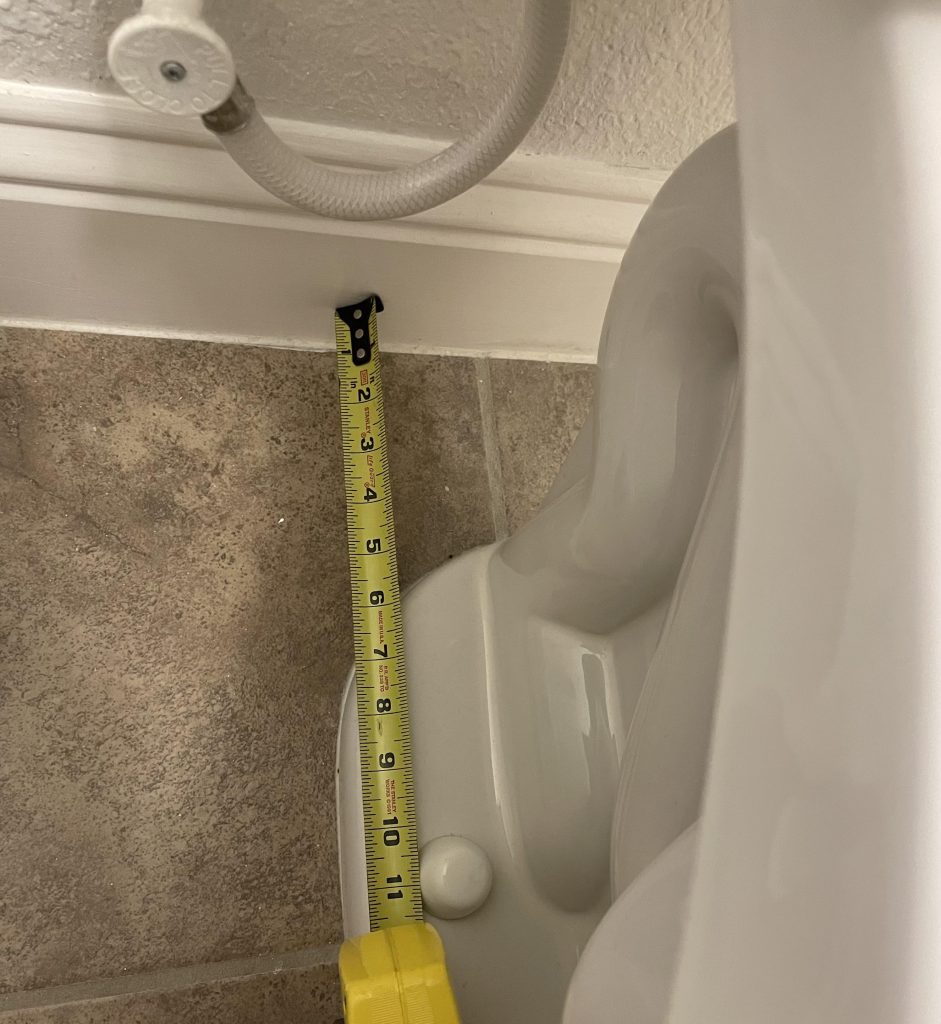
Credit: www.reddit.com
Tools And Materials Needed
Replacing a toilet wax ring requires basic tools and materials. You’ll need a wrench, putty knife, and new wax ring. Gather rubber gloves, a sponge, and towels for cleanup. Ensure you have all items ready for a smooth process.
Replacing a wax ring on a toilet might sound daunting, but with the right tools and materials, you can transform it into a simple DIY task. Imagine the satisfaction of fixing a pesky leak with your own hands. But before diving in, ensure you have everything you need to avoid unnecessary trips to the store. Here’s a breakdown of essential tools and materials you’ll need for the job.
Essential Tools
Preparation is key when tackling any home project. Start by gathering the following tools:
– Adjustable Wrench: Crucial for loosening nuts and bolts securing your toilet.
– Putty Knife: Handy for removing old wax residue from the toilet base and flange.
– Sponge or Towels: Essential for cleaning up water spills. You don’t want water pooling around your work area.
– Bucket: Useful for draining water from the toilet tank and bowl. That also must have in your home.
Have you ever been halfway through a project only to realize you’re missing a critical tool? Avoid that frustration by laying everything out beforehand.
Materials Checklist
Now, let’s talk about materials. Here’s what you need:
– Wax Ring: The star of the show. Opt for a high-quality ring to ensure a good seal.
– New Bolts and Washers (included with New Wax Ring): It’s a good idea to replace them to ensure a snug fit.
– Plumber’s Tape: Use this to wrap threads on the water supply line, preventing leaks.
– Gloves: Protect your hands from grime and germs while working.
Imagine realizing your wax ring isn’t quite the right size. A simple oversight can stall your progress. Double-check dimensions and compatibility with your toilet model.
Before you start, take a moment to visualize the process. Do you feel ready, or do you need a quick run to grab missing items? Being prepared can make all the difference between a smooth fix and a frustrating ordeal.
Preparing The Area
First, ensure the water supply to the toilet is turned off. Drain the tank and bowl completely. Remove any obstacles around the toilet for easy access.
Before diving into the task of replacing a wax ring on your toilet, it’s crucial to prepare the area properly. This preparation ensures a smooth process and reduces the risk of mistakes. A well-prepared space can save you time and prevent potential water damage. Let’s break down the steps to ensure your workspace is ready for action.
Clearing The Space
Start by removing any items that might obstruct your work area. This includes bathroom accessories, floor mats, and anything else around the toilet. A clear space not only gives you room to maneuver but also helps avoid accidents.
Think about the tools you’ll need. Have them within reach to avoid unnecessary trips back and forth. A small toolbox or a designated area for your tools can keep you organized and focused.
Consider the floor. Bathrooms often have slick surfaces. Placing a drop cloth or old towels around the toilet can provide a stable footing and catch any drips. Have you ever slipped while working on a project? Ensuring a dry surface can prevent those mishaps.
Turning Off Water Supply
Locate the water shut-off valve behind your toilet. Turn it clockwise to stop the flow of water. It’s a simple step, yet it’s often overlooked.
Flush the toilet to drain as much water as possible from the tank and bowl. You might need to do this twice to remove most of the water. A sponge or small cup can help remove any remaining water from the bowl.
Double-check the water supply. Is it completely off? Sometimes valves can be stubborn and not fully close. Ensure there’s no trickle of water to avoid a mess later.
By preparing your area thoughtfully, you set the stage for a successful wax ring replacement. Are you ready to take on the challenge? With everything in place, you’re one step closer to a leak-free bathroom.
Removing The Old Toilet
Begin by carefully removing the old toilet to access the wax ring. Gently unscrew and lift it away. This prepares the area for replacing the wax ring on the toilet, ensuring a snug fit and preventing leaks.
Replacing the wax ring on your toilet might seem like a daunting task, but it’s actually straightforward when broken down into manageable steps. The first crucial step is removing the old toilet. This might sound intimidating, but with a bit of patience and the right tools, you can get it done without any hassle. Let’s walk through the process together.
Draining The Toilet
Begin by turning off the water supply. Locate the shut-off valve, usually found near the base of the toilet, and turn it clockwise until it stops. Flush the toilet to drain as much water as possible from the tank and bowl. Don’t forget to use a sponge or towel to soak up any remaining water in the tank and bowl. This ensures you’re not dealing with excess water when you move the toilet.
Unbolting The Toilet
Now, let’s tackle the bolts. Use a wrench to remove the nuts from the bolts that hold the toilet to the floor. If the bolts are rusty or stuck, a bit of penetrating oil can help loosen them. Once the nuts are off, gently rock the toilet back and forth to break the seal. Lift the toilet carefully and place it on its side on an old towel or blanket to avoid scratching your floor.
Removing the old toilet may sound like a lot of work, but breaking it into these smaller steps makes it manageable. Have you ever tried removing a toilet before? What challenges did you face? Share your experiences and let’s keep the conversation going.
Detaching The Wax Ring
Carefully lift the toilet to detach the old wax ring from the base. Ensure the area is clean for the new seal. Removing the ring requires a gentle but firm approach to avoid damage.
Detaching the wax ring from your toilet can seem like a daunting task at first. However, with a little patience and the right approach, it becomes manageable. Whether you’re a DIY enthusiast or a first-timer, following the correct steps will ensure a smooth replacement process.
Lifting The Toilet
The first step in detaching the wax ring is lifting the toilet. Begin by turning off the water supply to prevent any spills. Flush the toilet to empty the tank and bowl as much as possible. This will make the toilet lighter and easier to handle.
Once the water is off and the toilet is empty, unscrew the bolts that secure it to the floor. You might need a wrench for this part. Carefully lift the toilet by holding it from the base, making sure to keep it level. Have a friend help you if the toilet is too heavy to lift alone.
Are you wondering why lifting the toilet is so important? It gives you access to the wax ring, which is crucial for creating a seal between the toilet and the drainpipe.
Removing The Old Wax Ring
With the toilet lifted, you’re now ready to remove the old wax ring. The wax ring sits around the drain opening and might look a bit messy. Use a putty knife to scrape off the old wax.
Ensure that all remnants of the old wax are completely removed. This is important for forming a new seal with the replacement wax ring. Any leftover wax can hinder the new ring from sealing properly, potentially leading to leaks.
Dispose of the old wax in a plastic bag to keep your workspace clean. Have you ever noticed how a minor oversight can lead to bigger issues? Ensuring the area is clean prepares you for a successful installation of the new wax ring.
Removing the wax ring might seem like an insignificant step, but it’s essential for maintaining a leak-free and secure toilet installation. Have you ever skipped a step and regretted it later? This task is a great reminder of why attention to detail is crucial in DIY projects.
Cleaning And Inspecting
Ensure the toilet area is clean before replacing the wax ring. Inspect the flange and bolts for damage. Proper cleaning and inspection prevent future leaks and ensure a secure fit.
Cleaning and inspecting the toilet flange is a crucial step in replacing a wax ring. It’s not just about swapping out parts; it’s about ensuring a secure and leak-free fit. Imagine spending time and effort replacing a wax ring, only to have it fail because the foundation wasn’t properly cleaned or inspected. Taking a few extra moments to clean and inspect can save you from headaches later. Let’s dive into the specifics of cleaning the flange and inspecting for damage.
Cleaning The Flange
Start by removing any old wax residue from the flange. A putty knife can be your best friend here. It’s surprising how much gunk can build up over time.
Once the old wax is gone, grab a rag and some mild cleaner. Wipe down the flange thoroughly. You want it to be as clean as possible for a solid connection with the new wax ring.
Consider using a small brush for any stubborn grime. It’s worth the effort to get into the nooks and crannies. A clean flange is a foundation for success.
Inspecting For Damage
Now that the flange is clean, take a closer look. Are there any cracks or chips? These could compromise the seal and lead to leaks.
If you spot any issues, you might need to replace the flange. This can seem daunting, but it’s a necessary step for a long-lasting fix.
Consider how often you’ve ignored small issues in your home, thinking they wouldn’t escalate. Addressing flange damage now prevents bigger problems later. Are you willing to risk a leak in your bathroom?
Every detail matters when ensuring your toilet functions perfectly. Cleaning and inspecting might seem mundane, but they are essential steps in making sure your efforts pay off. Don’t skip them. You’ll thank yourself for the peace of mind that comes with knowing the job is done right.
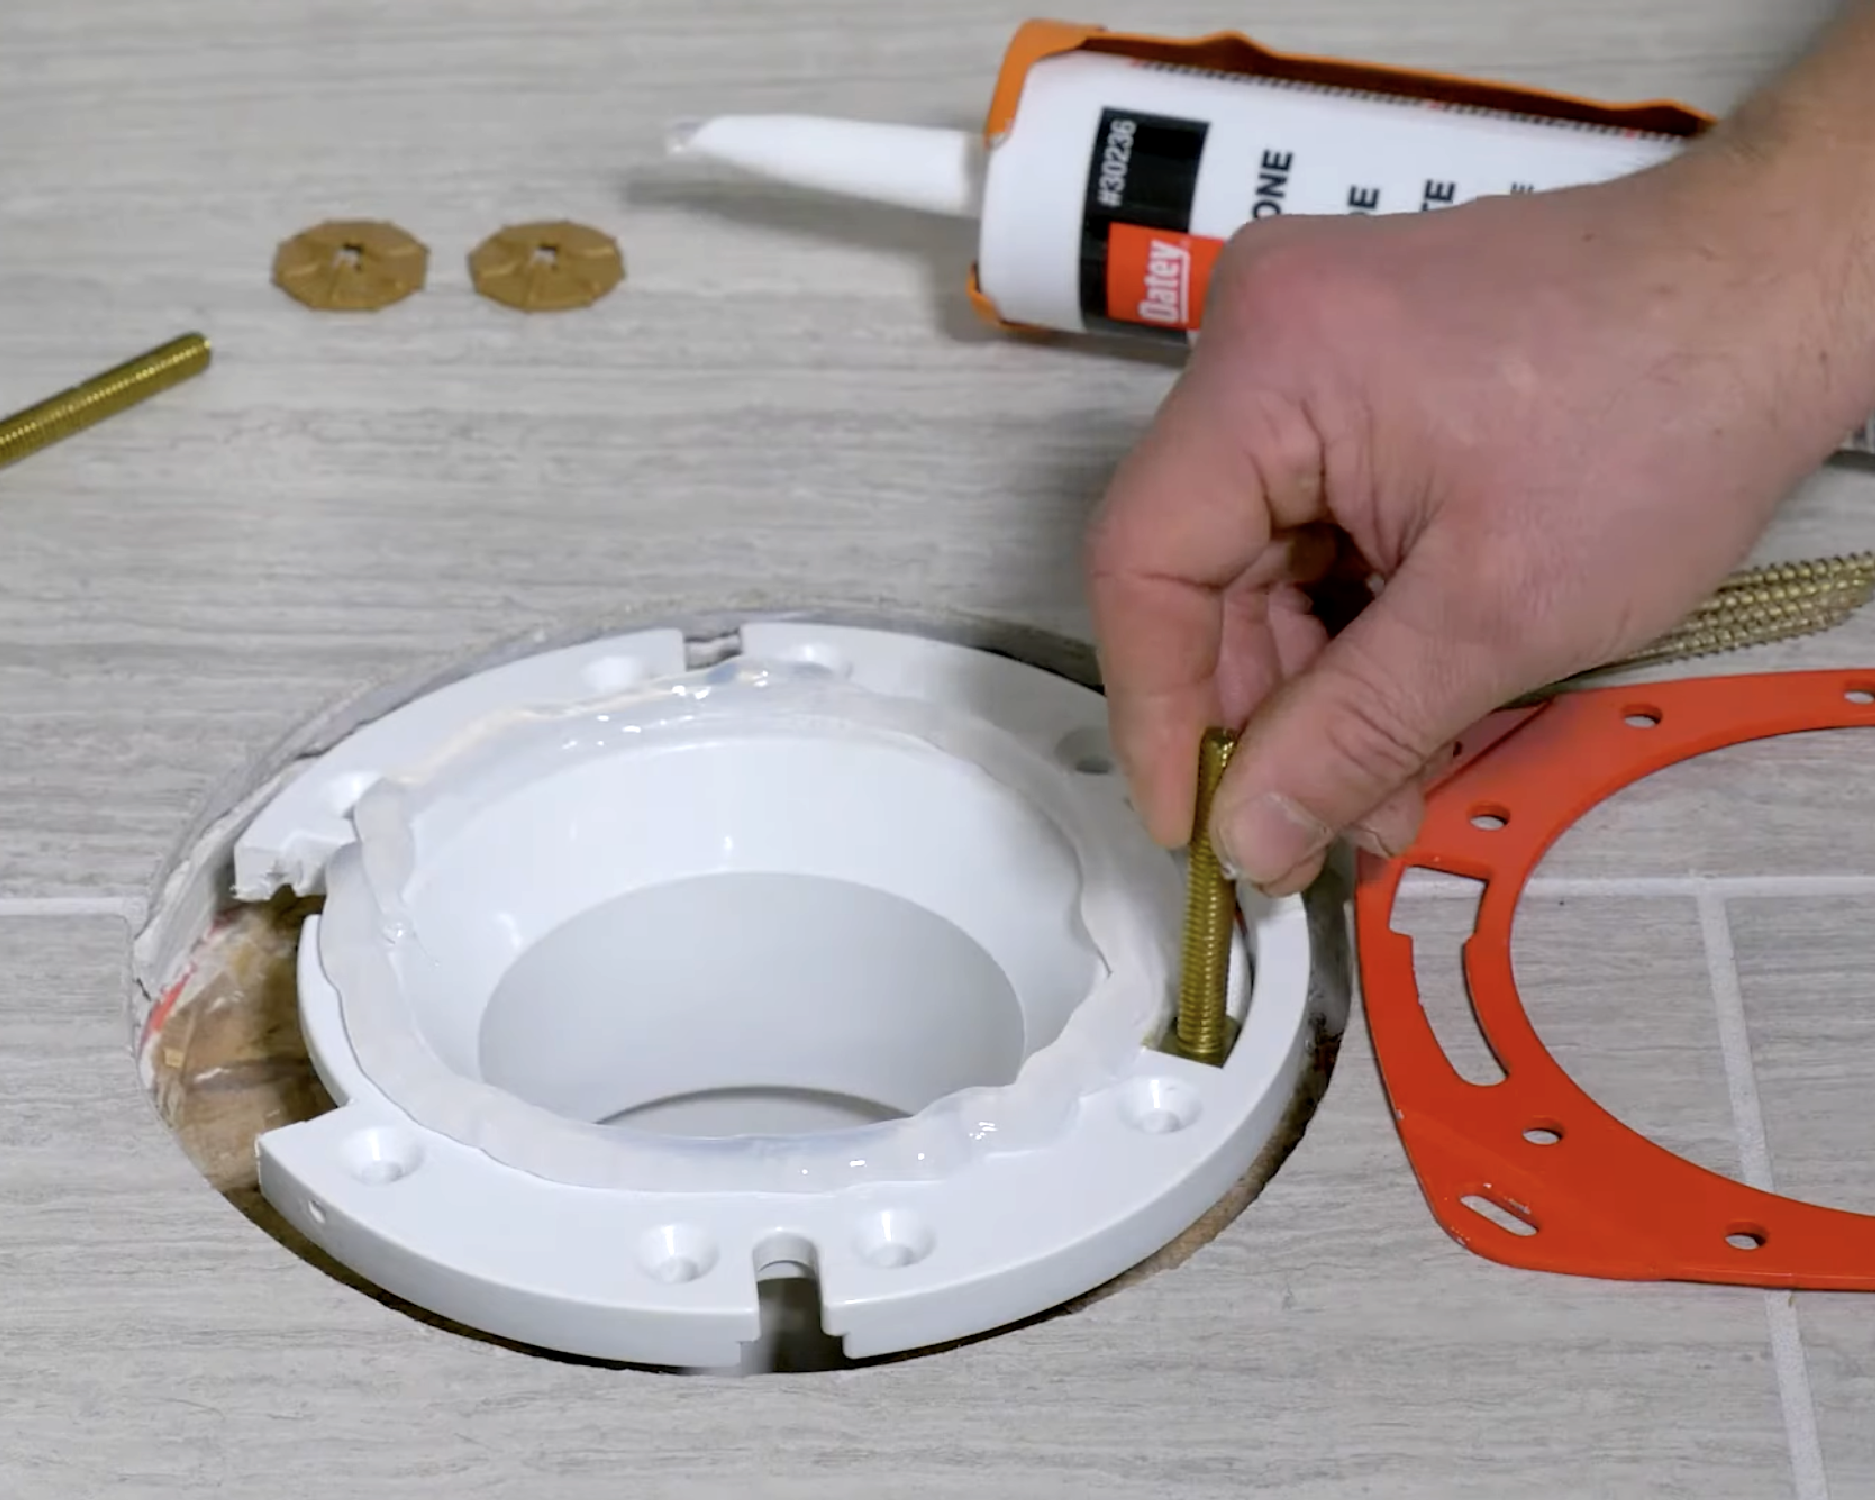
Installing The New Wax Ring
Replacing a toilet wax ring involves removing the old one and setting the new ring in place. Ensure a tight seal by correctly positioning the ring to prevent leaks. Secure the toilet back onto the flange for a successful installation.
Replacing a wax ring on your toilet might seem daunting, but it’s a manageable task with the right guidance. The wax ring is crucial for preventing water leaks and unpleasant odors. If you notice water pooling around your toilet base, it’s time for a replacement. Here, we’ll dive into the step-by-step process of installing a new wax ring, ensuring you’re equipped to handle this home maintenance task with confidence.
Positioning The Wax Ring
First, you need to prepare the surface. Clean the flange thoroughly and remove any old wax residue. This ensures a smooth installation and a better seal.
Select a high-quality wax ring. These are available at most hardware stores and come in different thicknesses. If your floor is uneven, a thicker ring might be needed.
Place the wax ring on the flange rather than the toilet’s base. This method provides better alignment when lowering the toilet.
Placing The Toilet
Carefully lift the toilet and align it over the flange. It’s a task that might require a second pair of hands for accuracy.
Lower the toilet gently onto the wax ring. You should feel it compress and seal. Avoid wiggling the toilet to prevent breaking the seal.
Secure the toilet by tightening the bolts evenly. Tighten each side a little at a time to maintain balance. Over-tightening can crack the porcelain, so be cautious.
After securing the toilet, check for any movement. If it rocks slightly, you might need to add shims for stability.
Have you ever felt the satisfaction of completing a DIY project? Successfully installing a new wax ring not only saves you money but also boosts your confidence in handling home repairs.
Would you consider tackling more home improvement tasks after this?
Securing The Toilet
Replacing a wax ring on a toilet is a simple task. First, turn off the water supply. Next, remove the toilet and old wax ring. Finally, install the new wax ring and reposition the toilet.
Securing the toilet is a crucial step in replacing a wax ring. After positioning the toilet correctly, ensuring it stays stable is essential. You want the toilet to remain firm without wobbling. This will prevent leaks and maintain bathroom safety. Follow these steps to bolt and check your toilet’s stability.
Bolting The Toilet
Begin by aligning the toilet over the flange. Make sure the bolt holes in the toilet base match the flange bolts. Carefully lower the toilet onto the wax ring. Apply gentle pressure to create a good seal. Once aligned, use a washer and nut on each bolt. Tighten them equally. Do not over-tighten as this may crack the toilet base. Check that the toilet sits flush with the floor.
Checking For Stability
After bolting, test the toilet’s stability by gently rocking it. If it moves, tighten the bolts slightly. Ensure the floor beneath is level. An uneven floor may cause instability. Place shims under the toilet base if needed. Check that the toilet does not wobble in any direction. Finally, sit on the toilet to confirm it feels secure. Properly securing the toilet ensures long-lasting performance and peace of mind.
Testing And Final Steps
Testing and final steps involve checking the toilet for leaks and ensuring it is securely in place. Flush the toilet to confirm a proper seal. Tighten any loose bolts and clean up the area.
Testing and final steps are crucial in replacing a toilet wax ring. You want to ensure everything works smoothly before calling the job done. Let’s dive into the necessary actions to guarantee success.
Turning On Water Supply
First, turn the water supply back on. This step is simple but vital. Slowly twist the valve to avoid sudden bursts. Listen for the water filling the tank. Make sure it flows smoothly without interruptions. If the tank refills, you’re on the right track.
Checking For Leaks
After the water is on, check for leaks around the toilet base. Look closely for any signs of water. Feel around the base with your hand. A dry floor means no leaks. If you spot water, tighten the bolts slightly. Inspect the floor regularly for the next few hours. Ensure everything stays dry and secure.
Completing these final steps ensures your toilet functions well. Proper testing prevents future issues. A little care now can save a lot of trouble later.
Read Also: How to Install a New Toilet
Frequently Asked Questions
Can You Replace A Toilet Wax Ring Yourself?
Yes, you can replace a toilet wax ring yourself. It requires basic tools and careful handling. Ensure you follow step-by-step instructions.
How Often Should You Replace The Wax Ring On A Toilet?
Replace the wax ring on a toilet every 3-5 years or if you notice leaks or unpleasant odors. Regular maintenance helps.
How Much Will A Plumber Charge To Change The Wax Ring On A Toilet?
A plumber typically charges $150 to $250 to change a toilet wax ring. Prices can vary based on location and complexity.
How Do I Know If The Toilet Wax Ring Needs Replacing?
You may need to replace the toilet wax ring if you notice water leaks around the base, unpleasant odors, or a wobbly toilet.
Final Words
Replacing a wax ring on a toilet may seem tricky, but it’s manageable. Follow our steps carefully and you will succeed. Ensure you have all the necessary tools and materials before starting. Take your time and work patiently. A properly installed wax ring prevents leaks and unpleasant odors.
You can save money by doing it yourself. Regular maintenance keeps your bathroom functioning well. Feel proud of your work once you finish. Share your experience with others and help them too. Happy fixing!